Duplicate photos are the biggest space hoggers. Yet it is common to take multiple photographs from just one angle and transfer them onto your Mac to save space on the phone. If you follow the same practice, it's time to stop. Doing so slows down your Mac’s performance, clutters it, quickly fills the storage space, and makes managing pictures challenging.
Here, we will explain how to delete duplicate pictures saved in the Photos Library and free up space. Keep reading, and you’ll learn the most effective ways to keep photos organized on Mac. Before that, let’s answer an important question.
Does Mac Have A Duplicate File Finder?
Sadly, there is no built-in duplicate file finder and cleaner. However, you are in luck if you are running macOS Ventura or a higher version. Apple has included a new version of the Photos app that will automatically scan the Photos Library for duplicate photos and videos. It also offers an option to merge files. However, if the duplicates are saved elsewhere or if you are using earlier macOS like Catalina, Monterey, or Big Sur, then it won’t work.
Why Does My Mac Have Duplicate Photos On It?
Duplicate images can be created for several reasons. Here, we enlist the most common one:
- Importing digital images from a phone or camera.
- Downloading the same image multiple times.
- Saving both edited and original pictures.
- Accidentally duplicating photographs.
- Saving pictures more than once.
How To Quickly Find And Delete Duplicates From The Photos Library And Mac?
Manually finding and removing duplicates from Mac is time-consuming and tedious. However, when using Duplicate Photos Fixer Pro, one of the best duplicate image cleaning software, things get simpler and more manageable. The software helps detect duplicate and similar images saved in the Photos Library on every Mac, and Dropbox folder. This means finding and deleting duplicate photos is now easier than ever.
Here are the steps to use Duplicate Photos Fixer Pro:
Note - The screenshots used in the articles are from macOS Sonoma. If you are a macOS Ventura user, the option name might vary.
1. Download, install, and run Duplicate Photos Fixer Pro.
2. Click the Add Photos Library button.
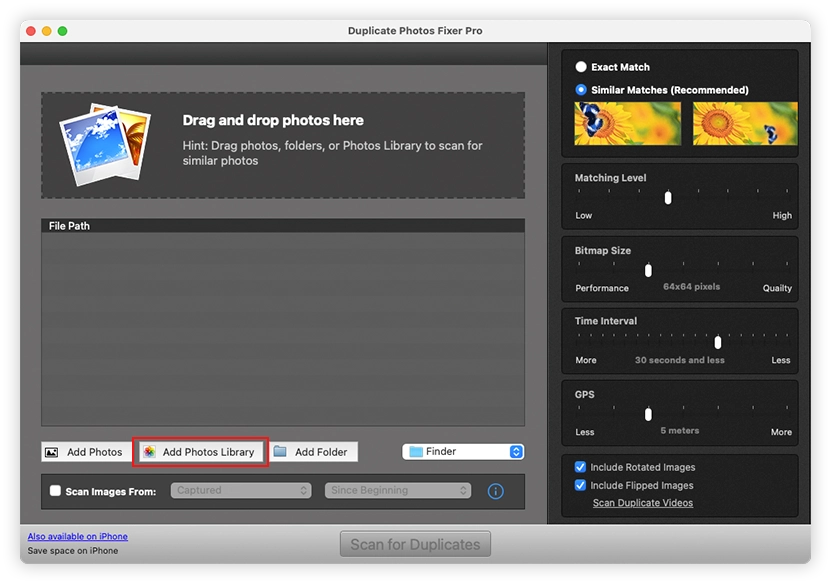
3. Select Photos Library > click Add Photos Library.
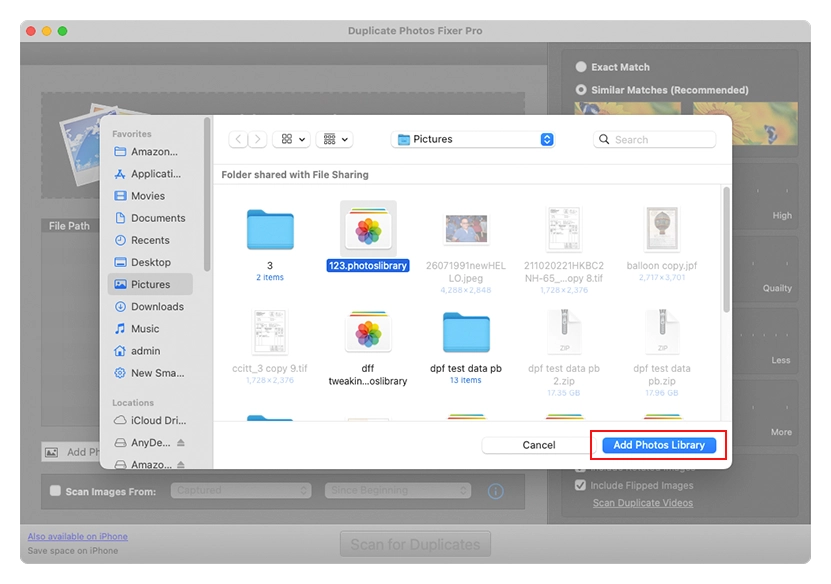
4. The Photos Library will now be added to Duplicate Photos Fixer Pro.
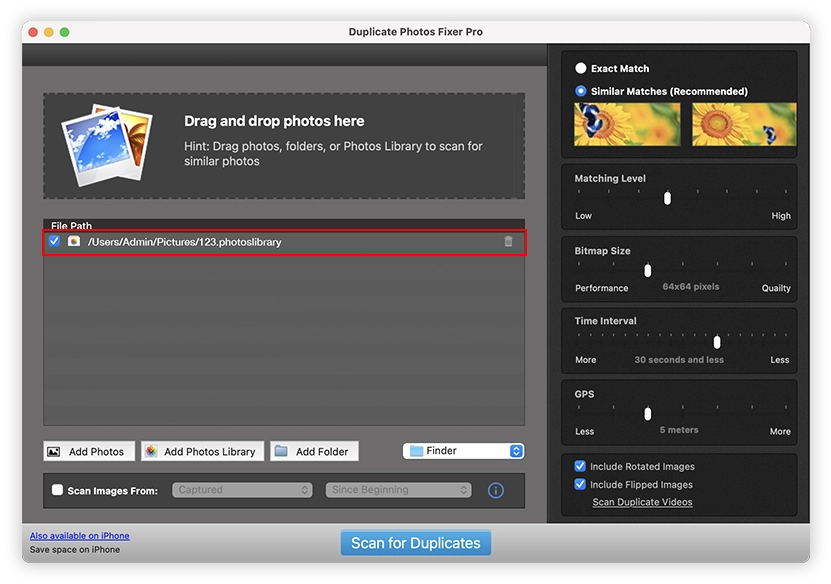
Note - If any other location is already added to Duplicate Photos Fixer Pro, the Photos Library will not be added.
5. After adding the Photos Library, select from the Comparison Methods -
Exact Match: This option will search for exact copies of images and scan duplicate videos. Click Preferences to make changes.
Similar Match (Recommended): It will search your Mac for similar photos
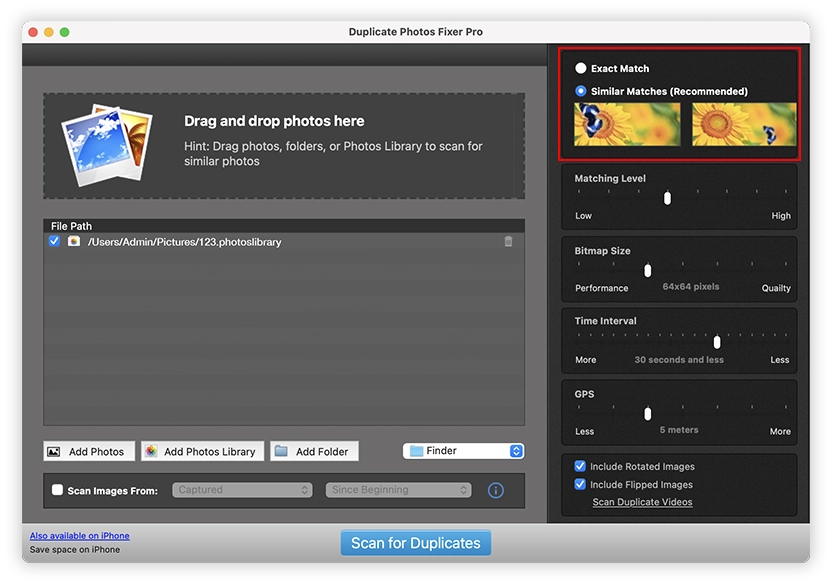
6. To start scanning, click the Scan for Duplicates button and wait for the scan to finish.

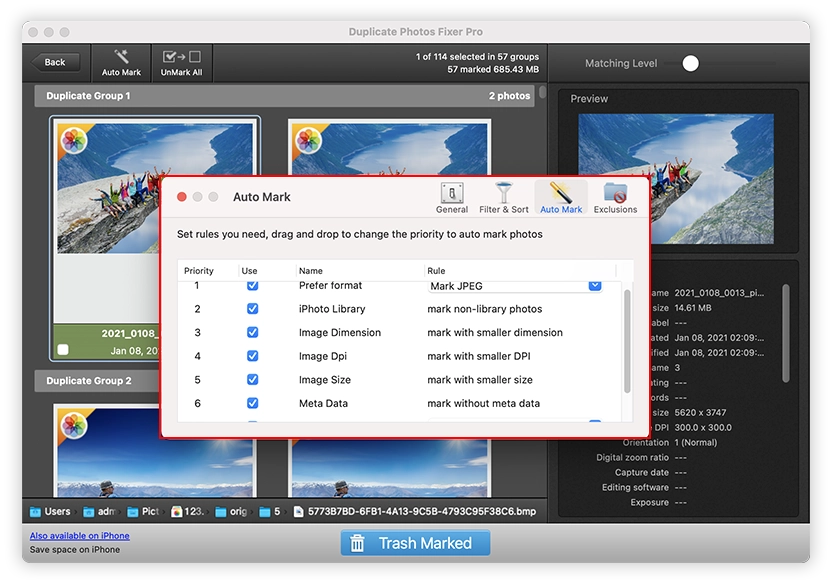
7. Review the scan results and select the duplicate pictures you wish to delete. If you have thousands of photos, you can use the Auto Mark feature to auto-select duplicates, leaving one in each group unmarked. To proceed, click Continue.
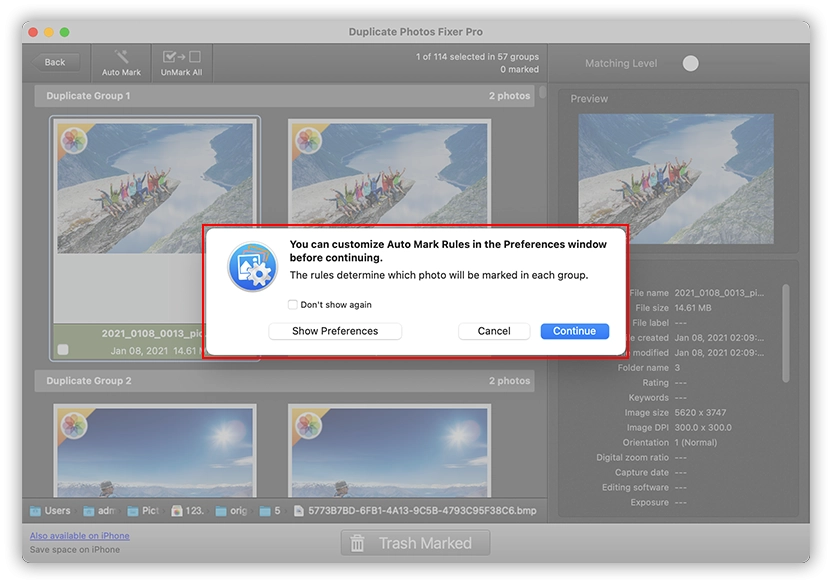
However, if you want to customize the auto-mark settings, instead of clicking Continue, click Show Preferences button.
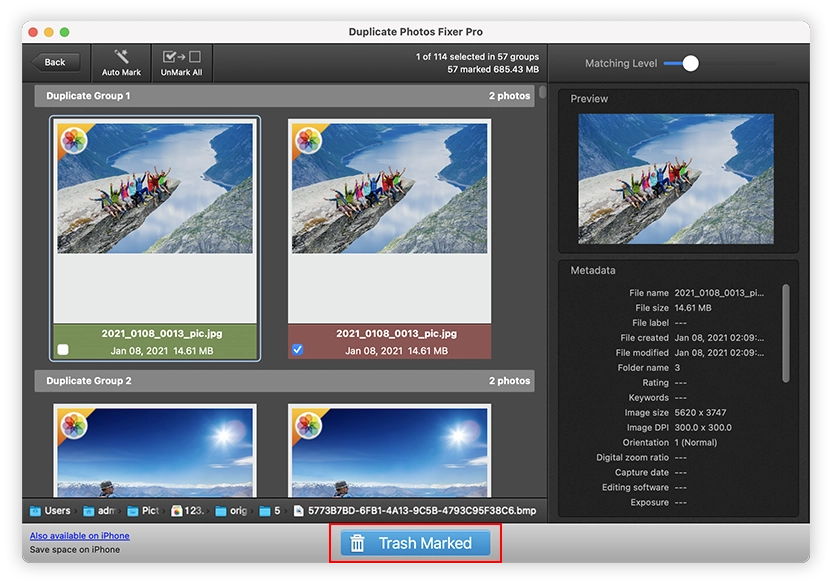
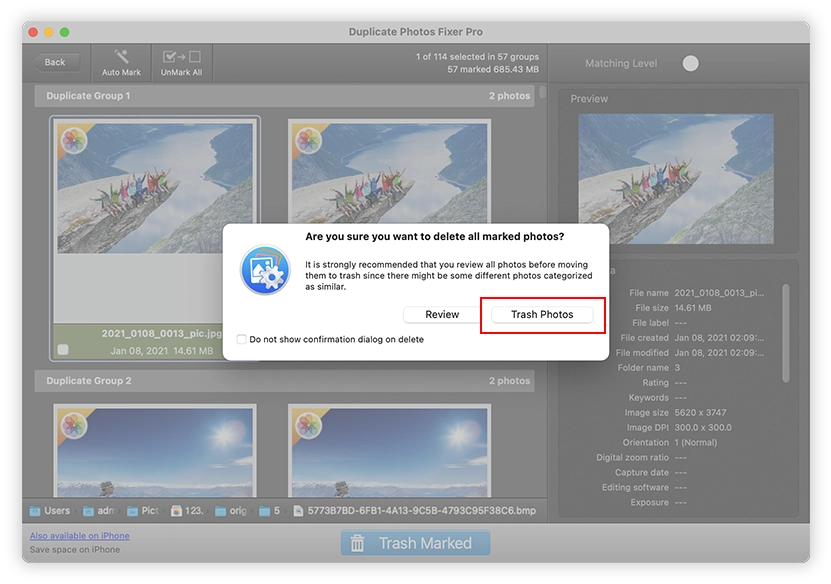
8. Next, to remove marked duplicates, click Trash Marked > confirm the action by clicking on Trash Photos.
9. You will now get a pop-up window with the steps to clean marked photos in the Photos App. Click the Next button in the tutorial to complete the process and move duplicates to the Duplicate Marked Photos album.
Note - If Photos app doesn’t launch automatically must launch it.
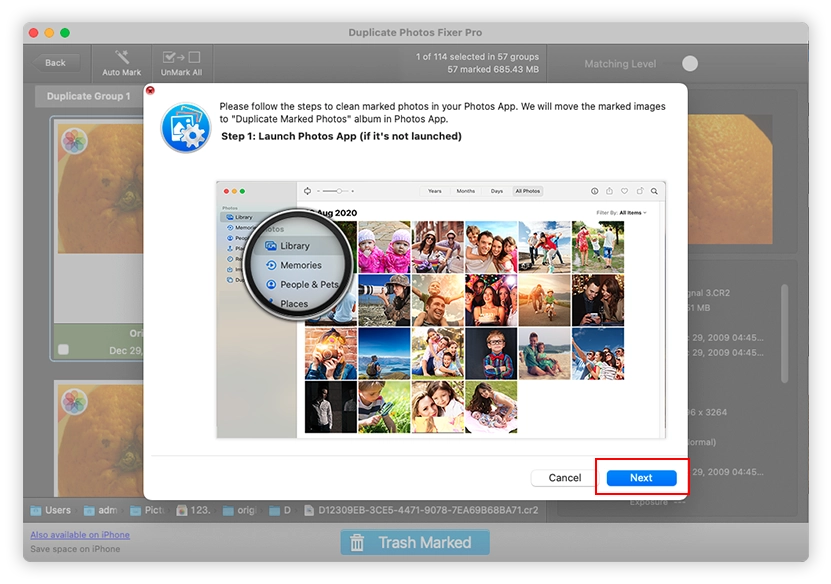
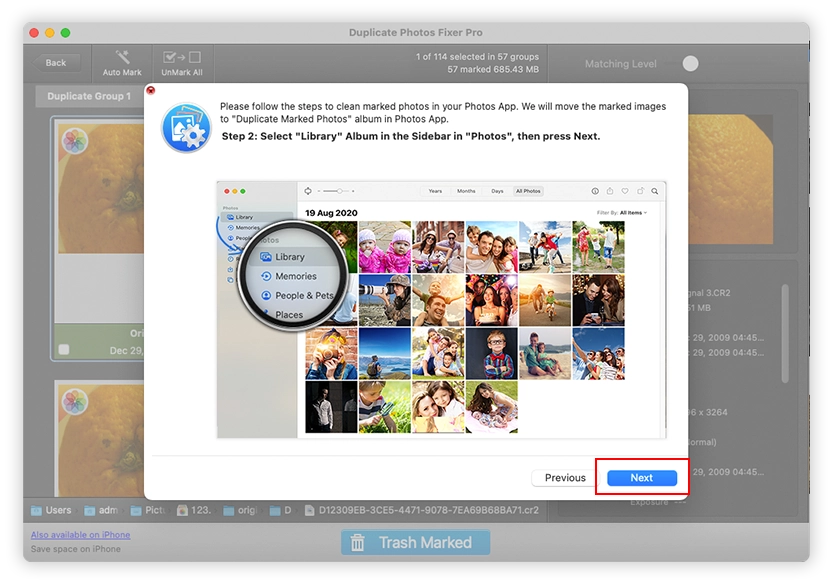
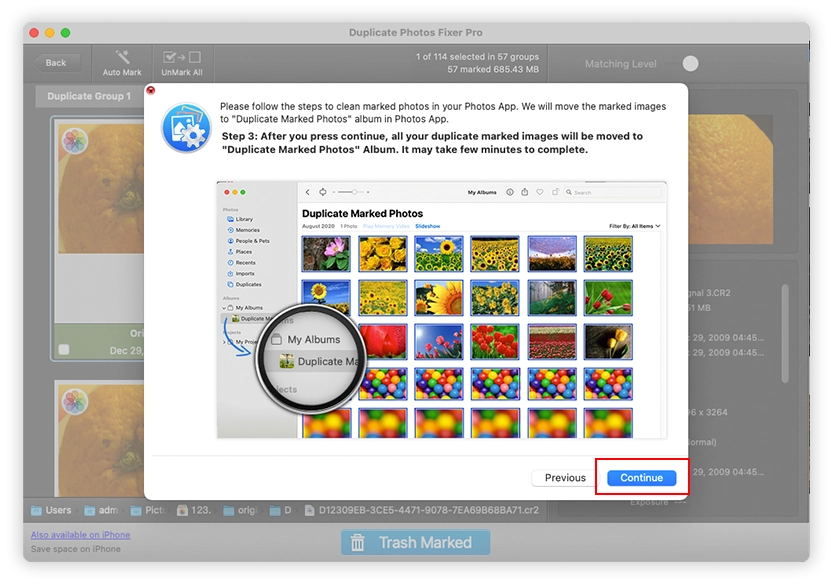
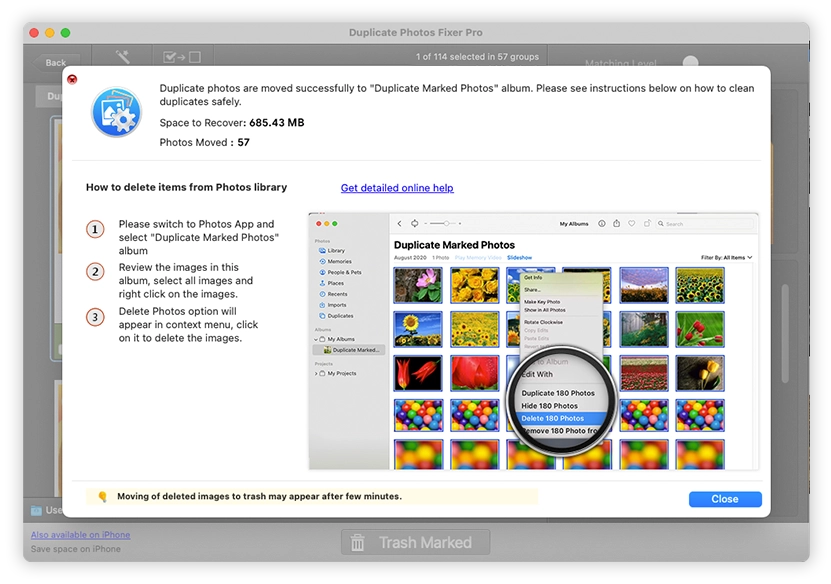
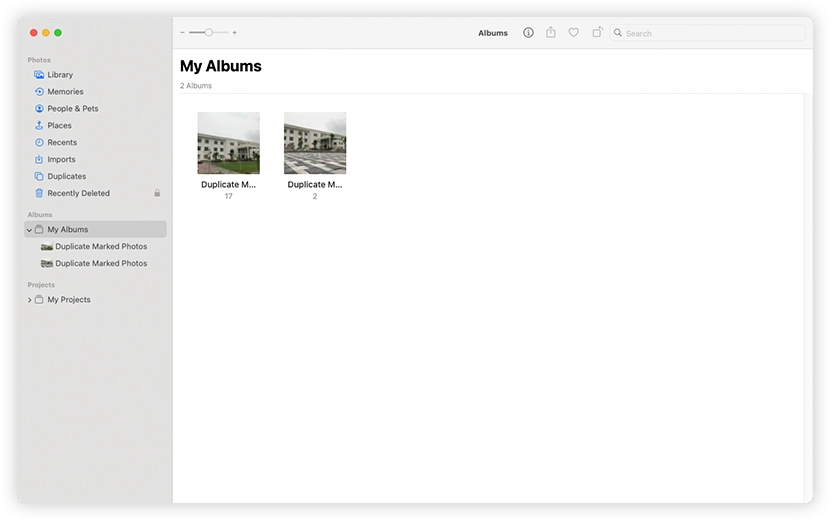
10. Now to remove these duplicates from your Mac open Photos App. Under Albums > click Duplicate Marked Photos.
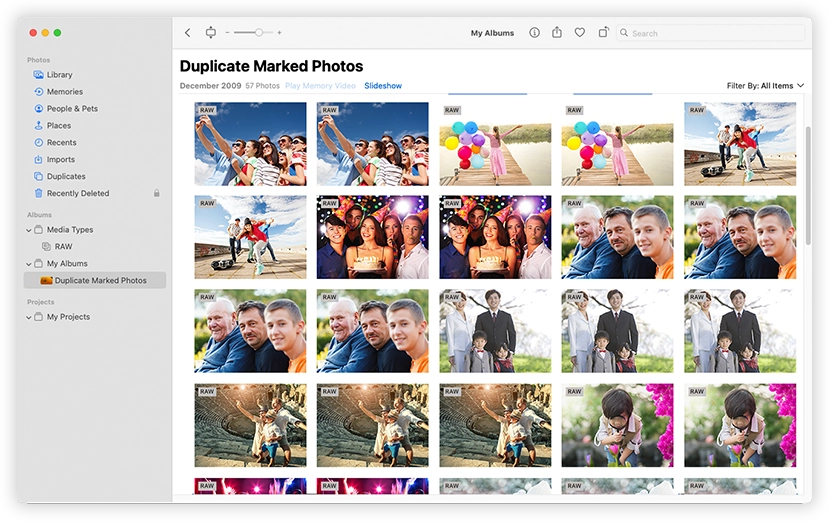
11. Review deleted duplicate photographs in the Duplicate Marked Photos album. Select the photos right-click them and select the Delete photos option with the photo count.
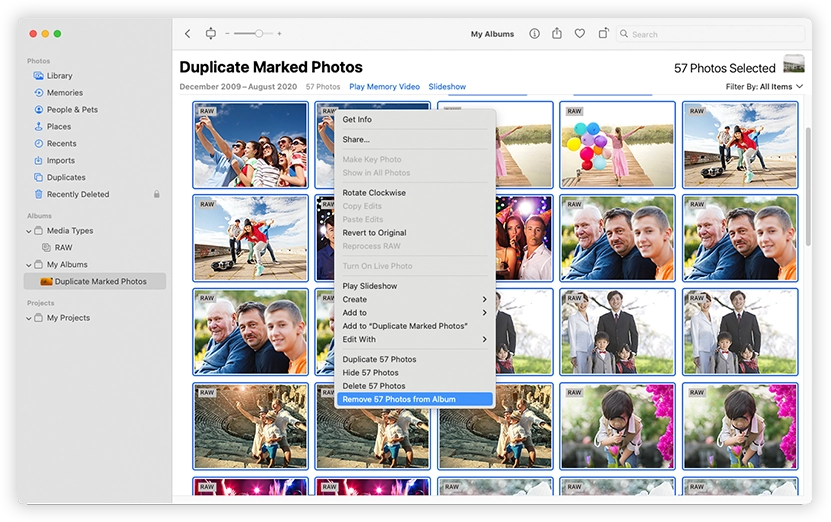
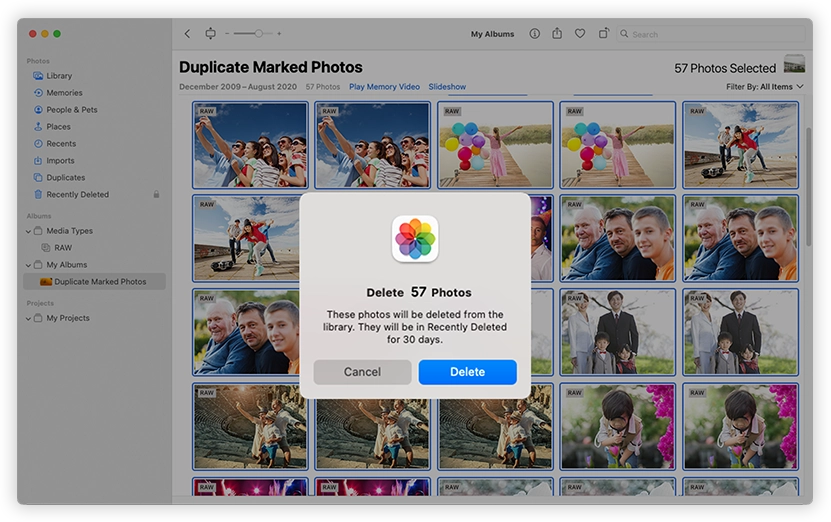
12. You will now get a confirmation pop-up window. Click Delete to remove duplicates from the Duplicate Marked Photos album. The photos will be deleted from the Duplicate Marked Photos album and will move to Recently Deleted Album and will be available for 30 days unless you delete them.
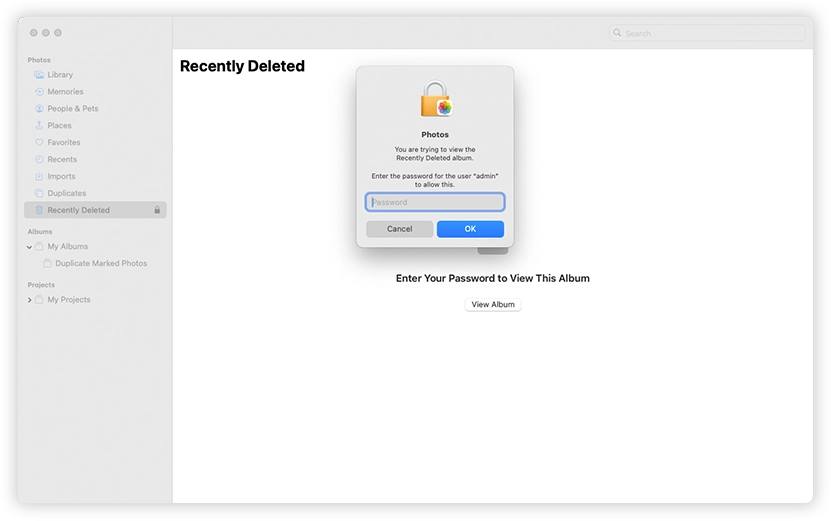
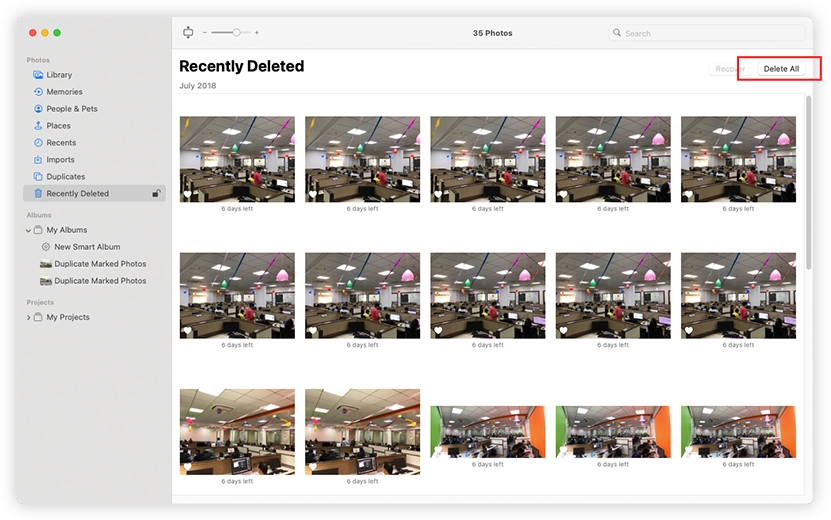
13. To delete them permanently go to Recently Deleted Album > click on View Album > enter user password > select the photos you want to delete or can click Delete All > Delete From This Mac. The selected images will now be permanently deleted and will no longer be available.
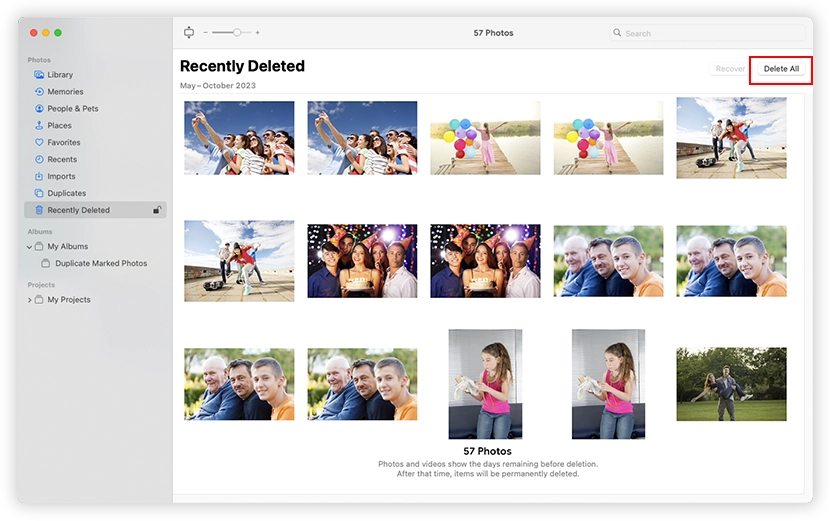
14. This is it! With these simple steps, you can remove duplicates from your Photos Library.
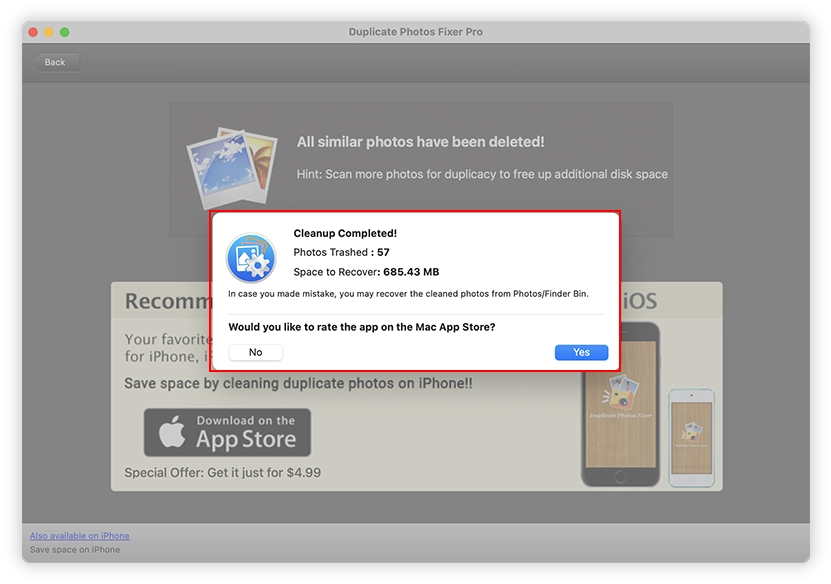
Duplicate Photos Fixer Pro will now show the cleanup summary.
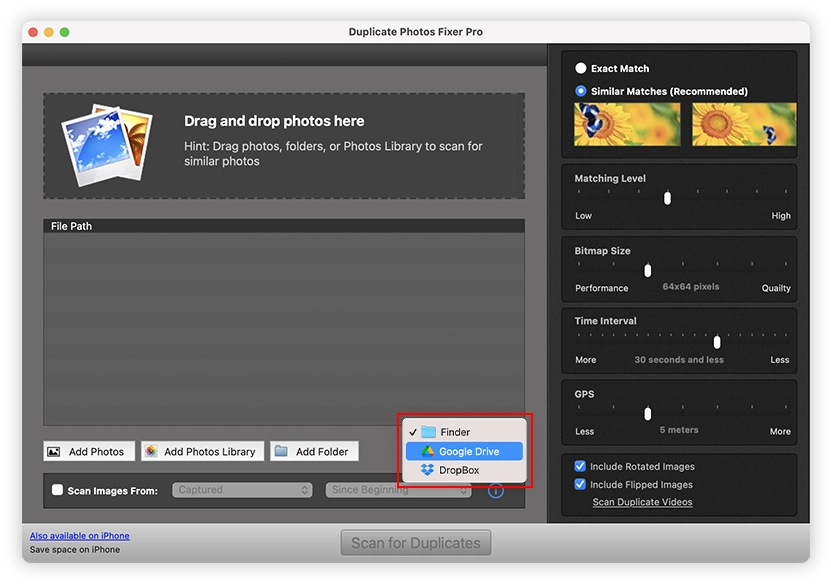
In addition, using Duplicate Photos Fixer Pro, you can find and delete duplicates saved in different locations on Mac and on cloud drives like Dropbox.
The tool is worth giving a try.
How To Manually Find And Remove Duplicates With The Photos App ?
When you import images to the Photos app, it automatically detects duplicate photos. However, if duplicate images are already in the Photos Library, you must clean them manually. To delete them manually via the Photos app, follow these steps.
Note - Photos app, by default, sorts pictures by captured date. However, if you face difficulty finding duplicates, you can search them using Smart Albums and filter photographs using different filters.
1. Run the Photos App.
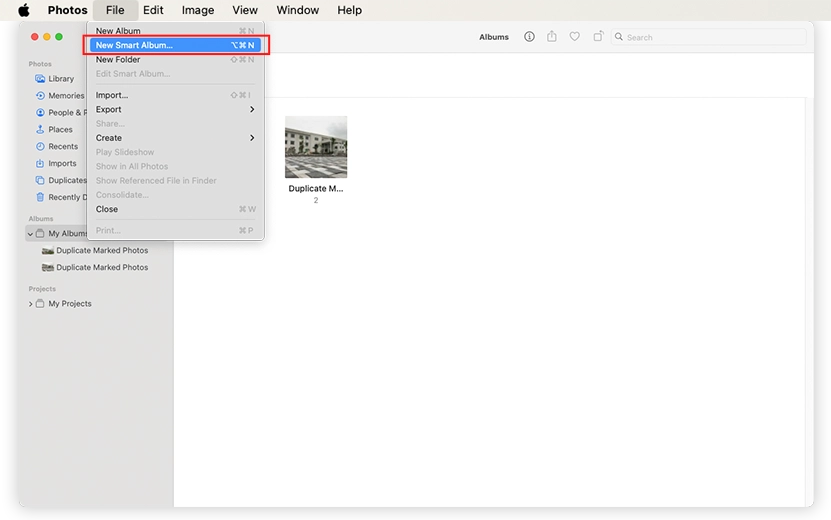
2. Click the File menu > select New Smart Album.
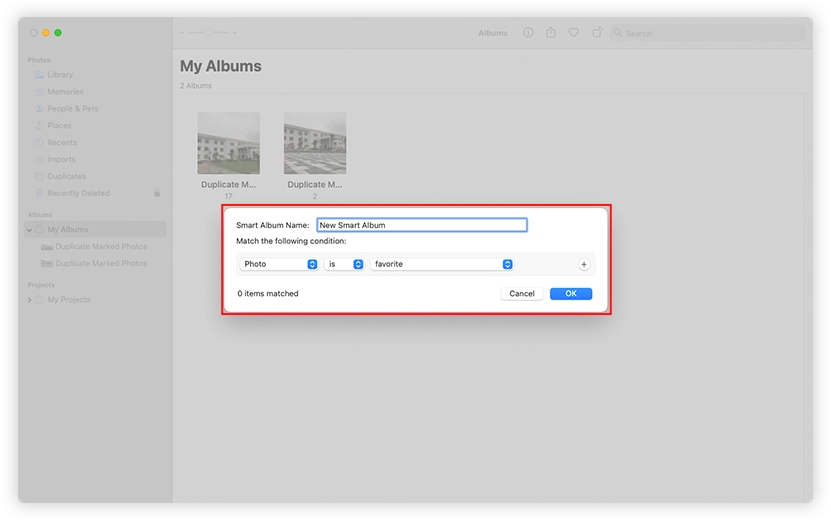
3. Name the Smart Album and set filter criteria.
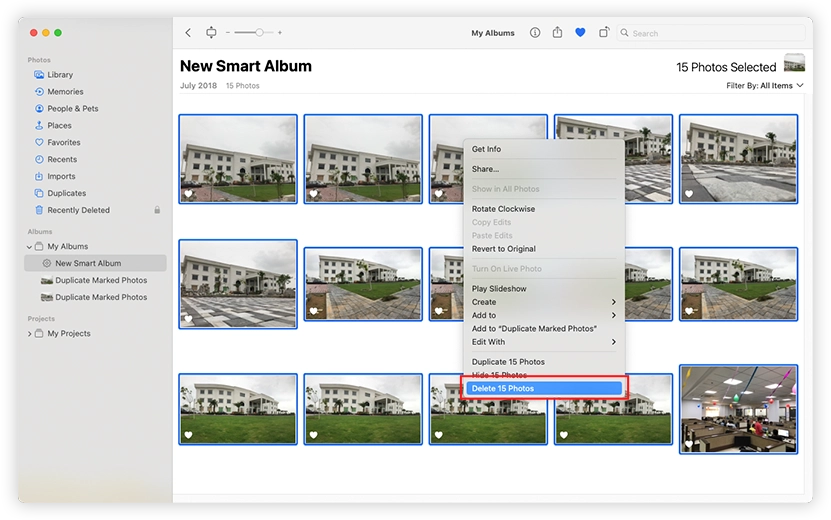
4. Select the images to delete > right-click > select Delete X Photos from the context menu.
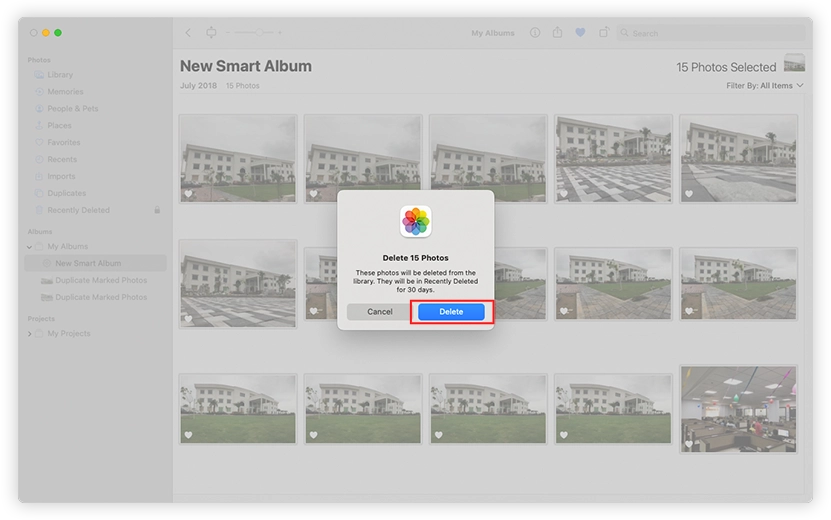
5. Confirm the action and click the Delete button.
6. To permanently remove all deleted pictures, click on the app's sidebar > click Recently Deleted > Delete All.
How To Manually Find And Delete Duplicate Photos On Mac With Finder ?
In addition to the above steps, you can find duplicates in the finder. You only need to select the New Smart Folder option to use this feature. To learn more about it, follow these steps:
1. Open Finder.
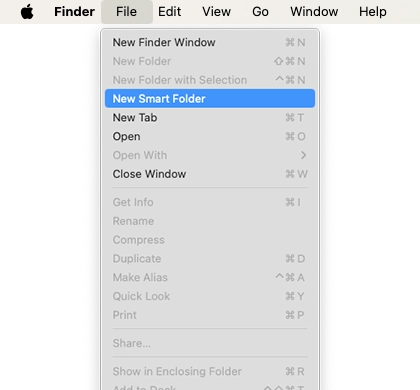
2. Click the File menu > select New Smart Folder.
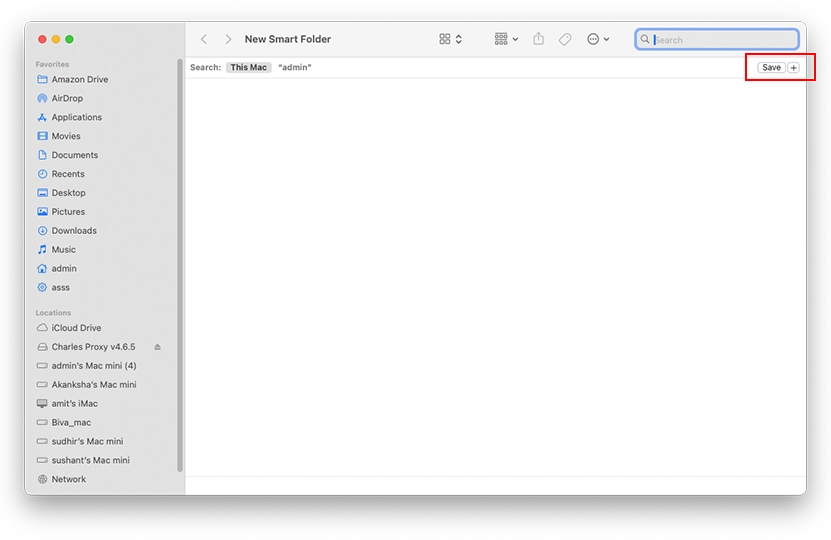
3. Open the New Smart Folder in the Finder.
4. Click the + button next to Save.
5. Next, from the drop-down menu, select Kind and Image.
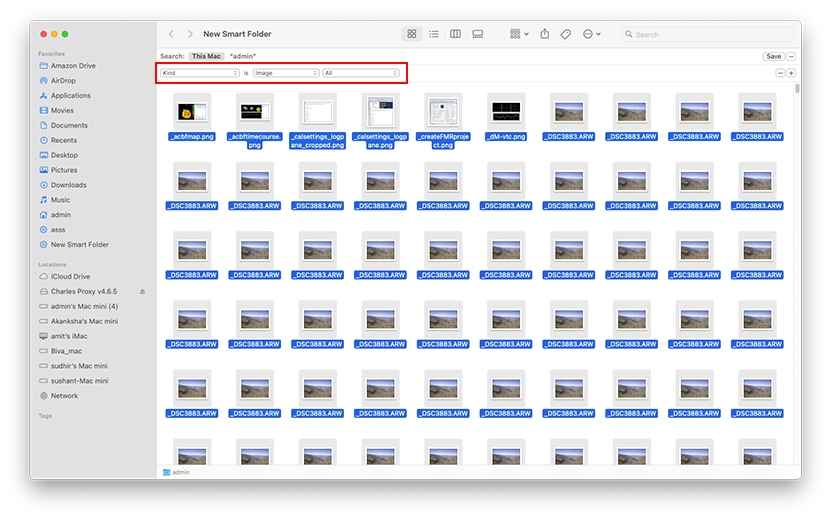
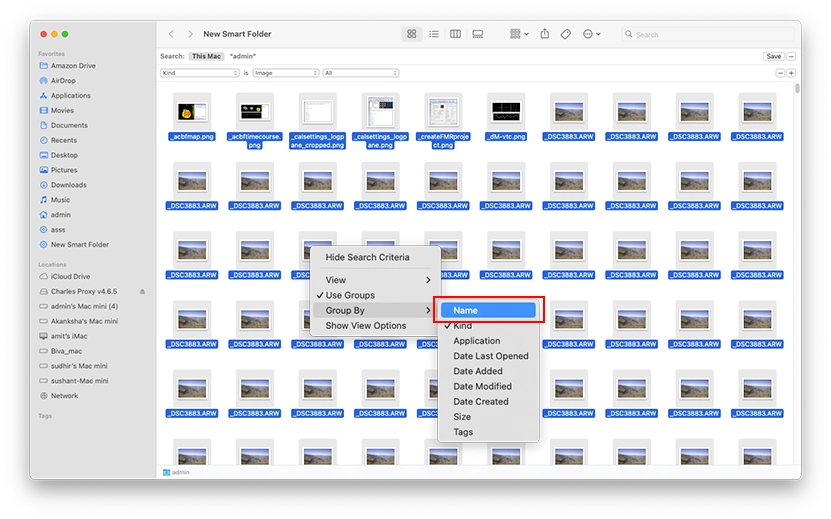
6. Sort images by name > Go through them and select the images to delete.
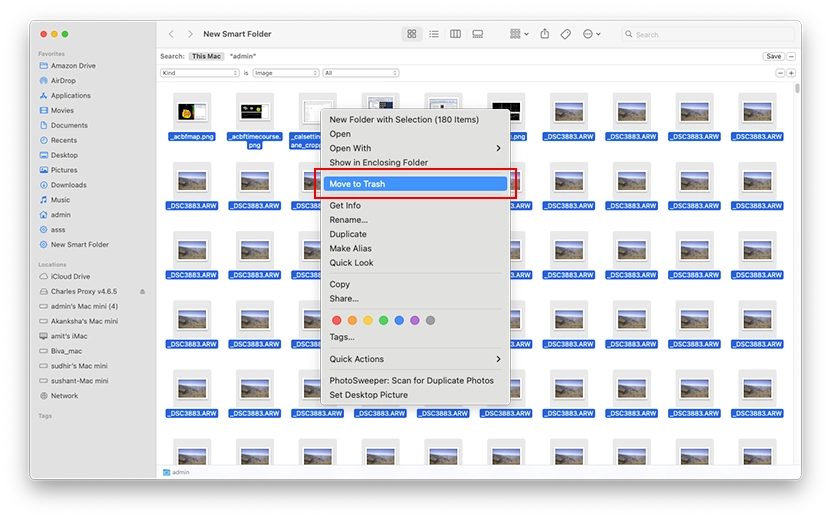
7. Right-click selected photos > select Move to Trash option from the context menu.
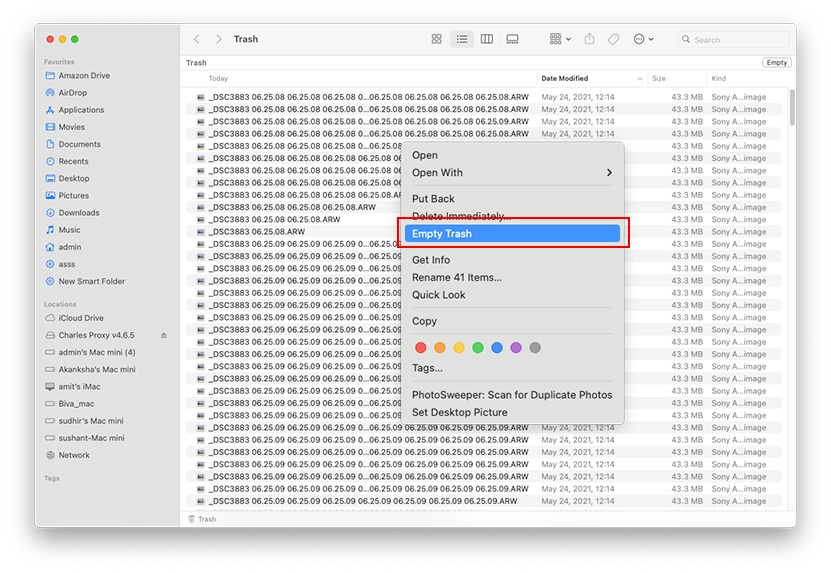
8. Empty Trash will permanently delete these duplicate images.
Cleaning Duplicates From The Photos Library And Organizing Images
We hope you can clean duplicates from your Photos Library using the above mentioned steps. In addition, if you want to free up more space from your Mac, select Finder as the scan mode > add folders or images > scan them and clean duplicates. This way, you can clean duplicates quickly using Duplicate Photos Fixer Pro. Also, you can clean duplicates from the cloud drive if you want. The tool is the answer to the problem caused by duplicate images; give it a try and enjoy a duplicate free Mac and Photos Library.
Enjoy gigabytes of free space with Duplicate Photos Fixer Pro.
