Why Do Duplicate Photos Appear In A Specific Folder?
Duplicate photos may appear in a specific folder for various reasons. Here are some common causes:
Manual Copying or Saving:If you manually copy or save images to a folder and forget that the files already exist there, you wind up with duplicates.
Importing from Multiple Sources:Duplicates may arise when you import images into the same folder from various cameras, devices, or cloud services, particularly if the pictures have identical names.
Syncing Issues:Duplicates can occasionally result from automatic syncing or backup procedures, particularly when involving several devices or cloud services.
File Renaming:You may inadvertently make duplicates if you rename files and save them in the same folder.
Software Glitches:Duplicate files can occasionally be created as a result of system or program bugs.
How Do I Find Duplicate Photos In A Specific Folder?
To locate and remove duplicate images from a specific folder, follow these steps:
Step 1 - Download Duplicate Photos Fixer Pro by clicking the download button below.
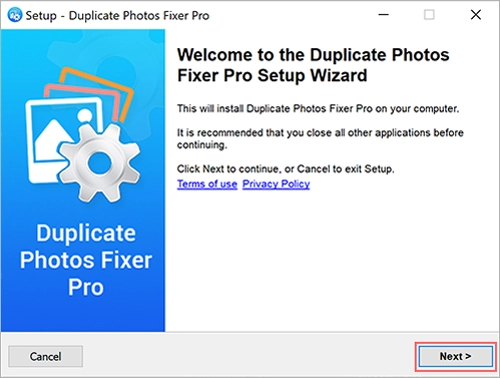
Step 2 - After the download, execute the setup file with a double click. Follow the on-screen instructions to install the application seamlessly.
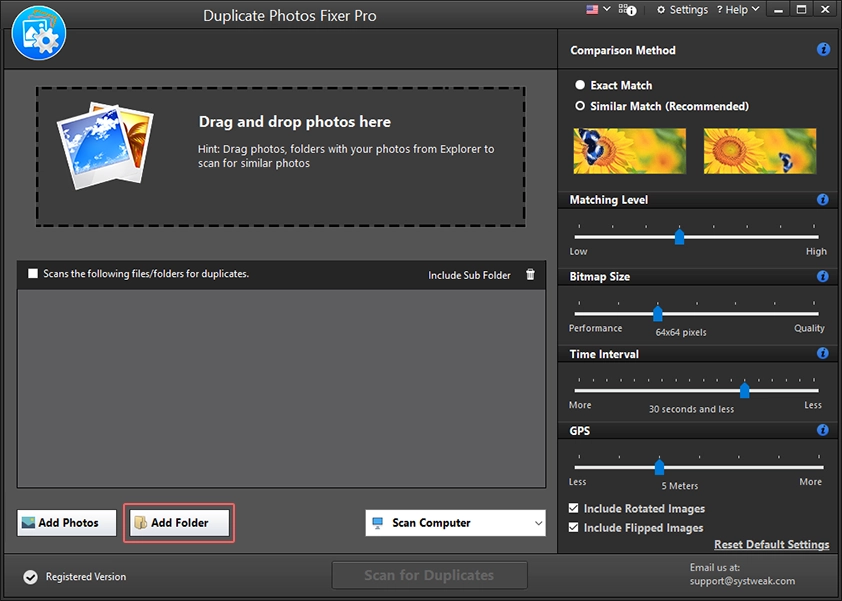
Step 3 - Launch Duplicate Photos Fixer Pro and navigate to the "Add Folder" option.
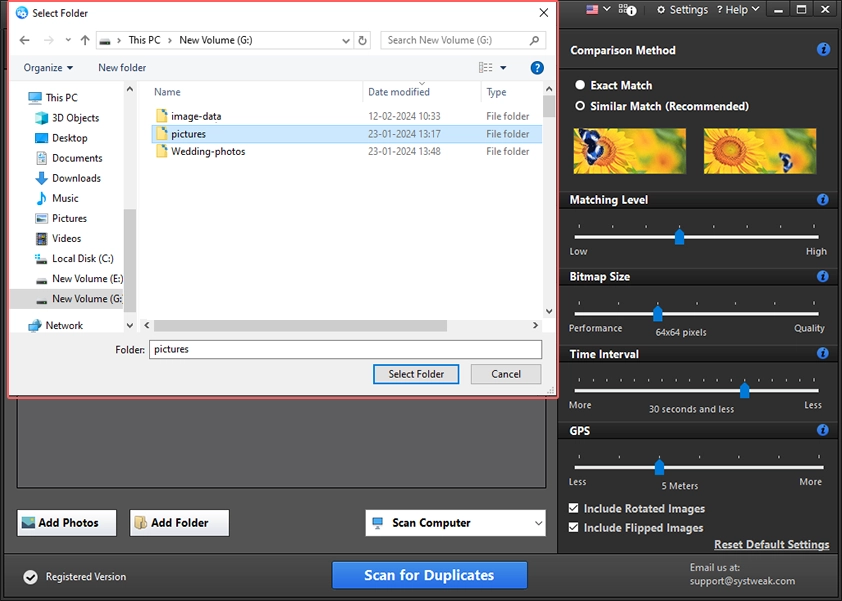
Step 4 - Choose the folder you wish to scan for duplicate photos.
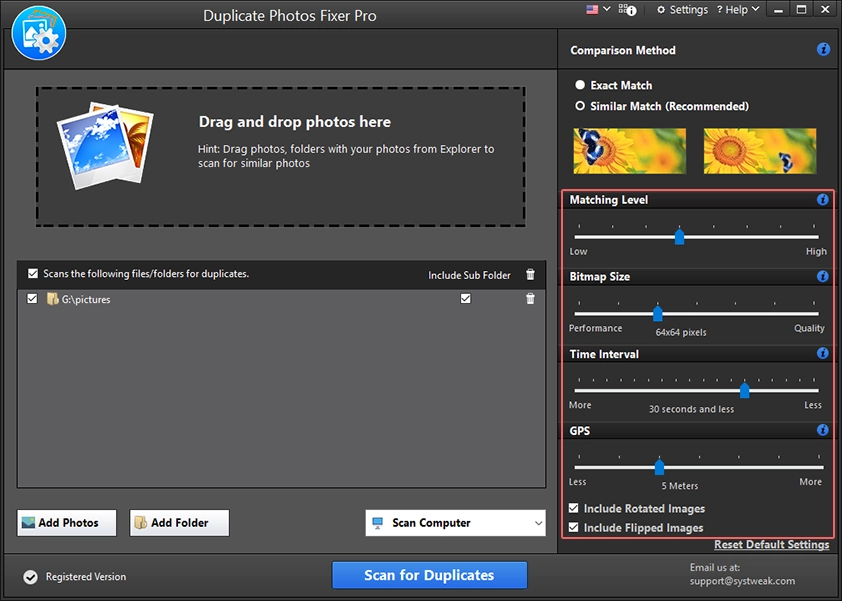
Step 5 - Choose from the comparison methods - Exact Match and Similar Match.
"Exact Match" to seek identical copies of photos exclusively."Similar Match”for all similar-looking images.
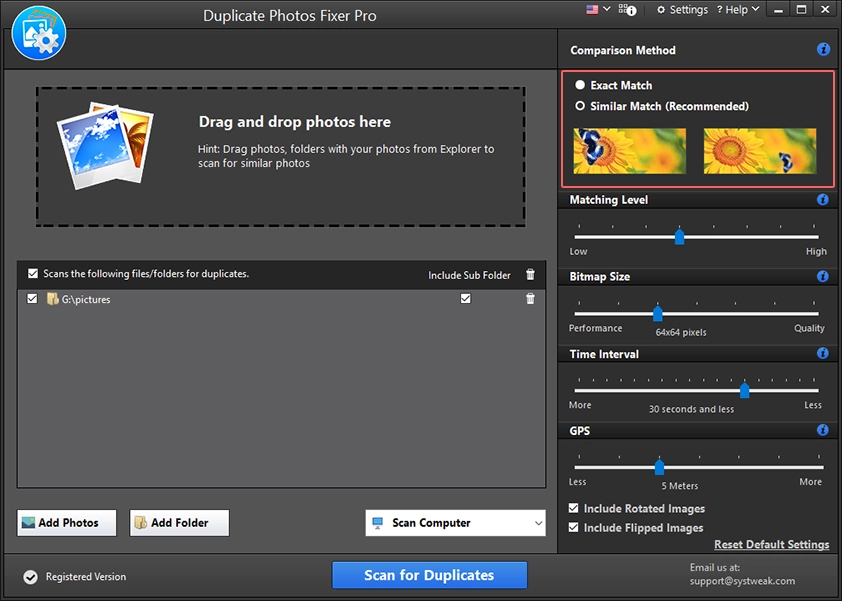
Step 6 - If you go with Similar Match, you can customize the parameters by moving the slider for Matching levels, Bitmap size, Time Interval, and GPS. Additionally, you can use options like "Include rotated images" and "Include flipped images" to detect duplicates with altered orientations.
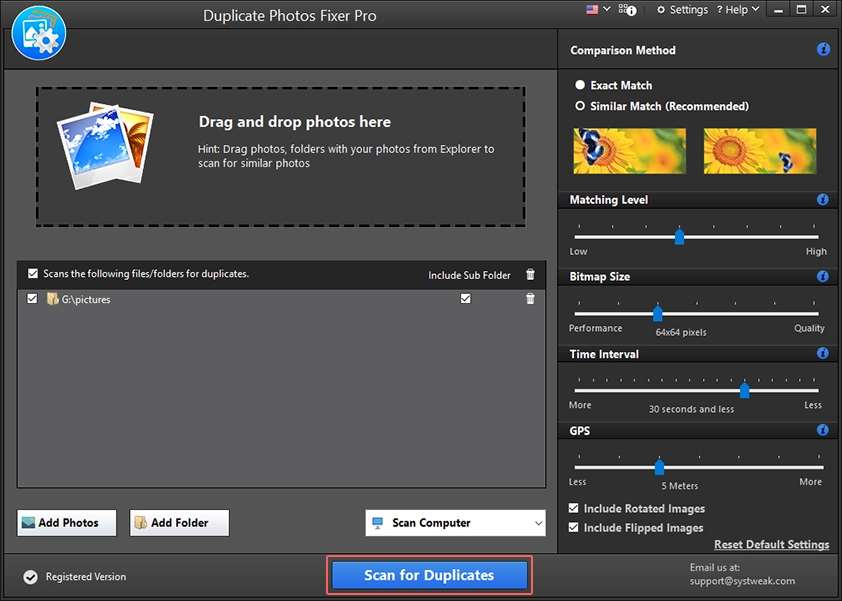
Step 7 - With your preferences in place, click the "Scan for Duplicates" to start scanning.
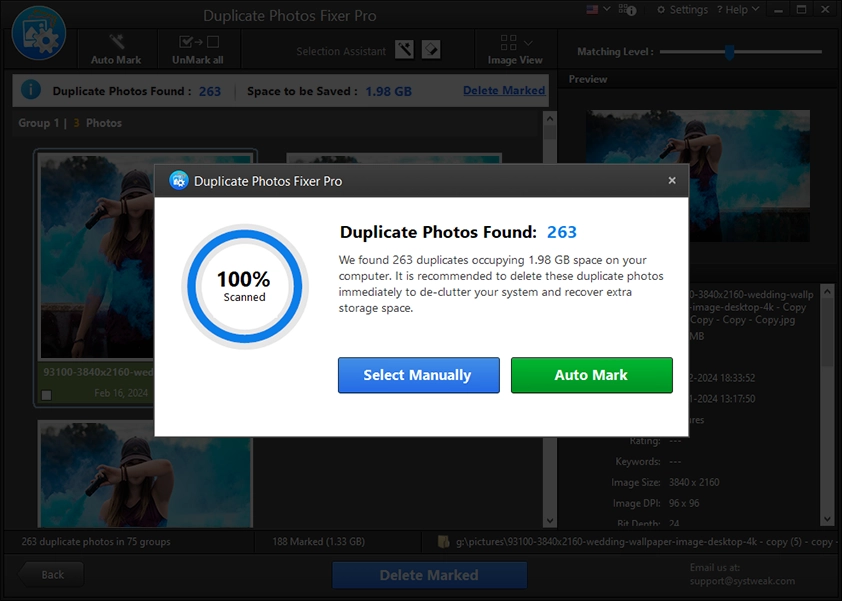
Step 8 - Let the scan finish. You will now be prompted to manually remove or auto-mark photos. Choose the option as per your preference. However, if you want to see the scanning results click the X icon. You will now be able to see a group-wise list of all the detected duplicates saved in the selected folder.
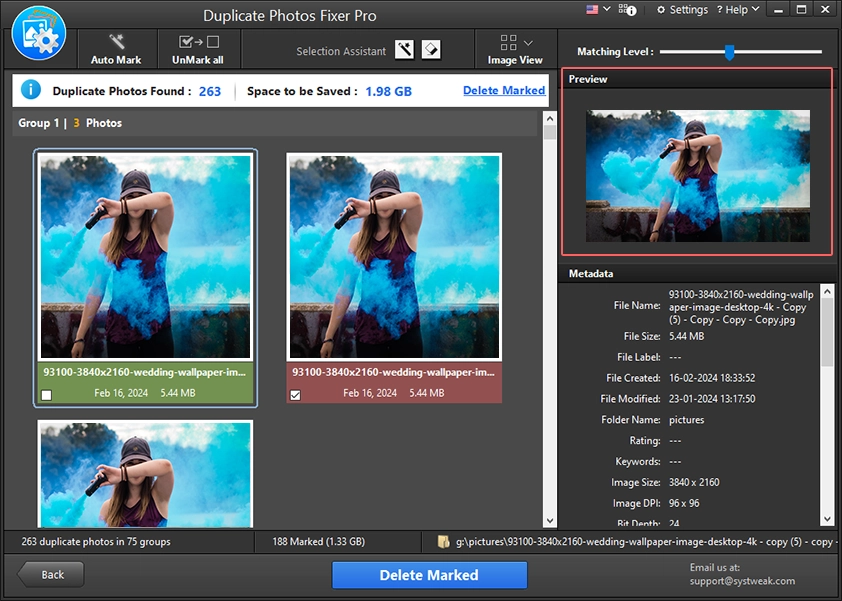
Step 9 - After reviewing the scan results to simplify the process click the "Auto Mark" button. This way, copies in each group, leaving one unmarked, will be automatically selected.
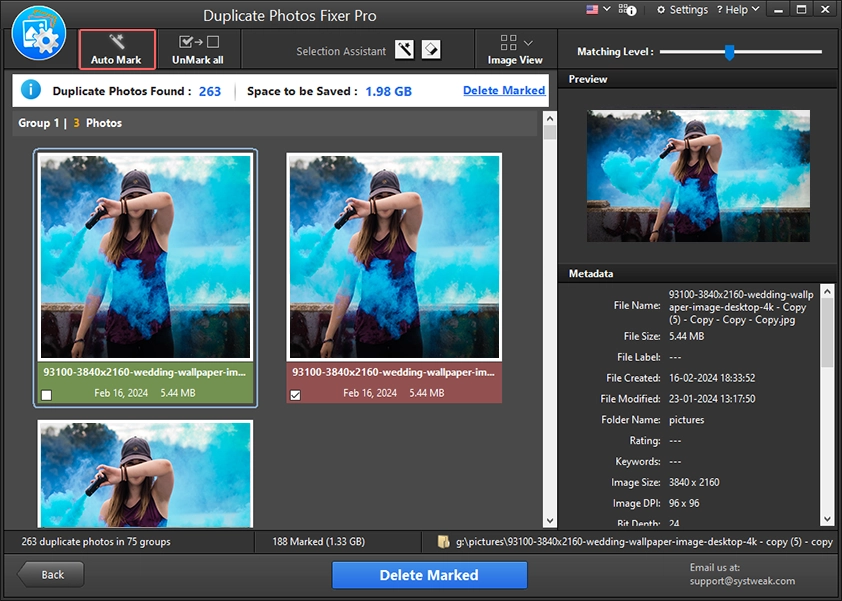
Step 10 - Click the "Delete Marked" button to erase the identified duplicate photos from the specified folder.
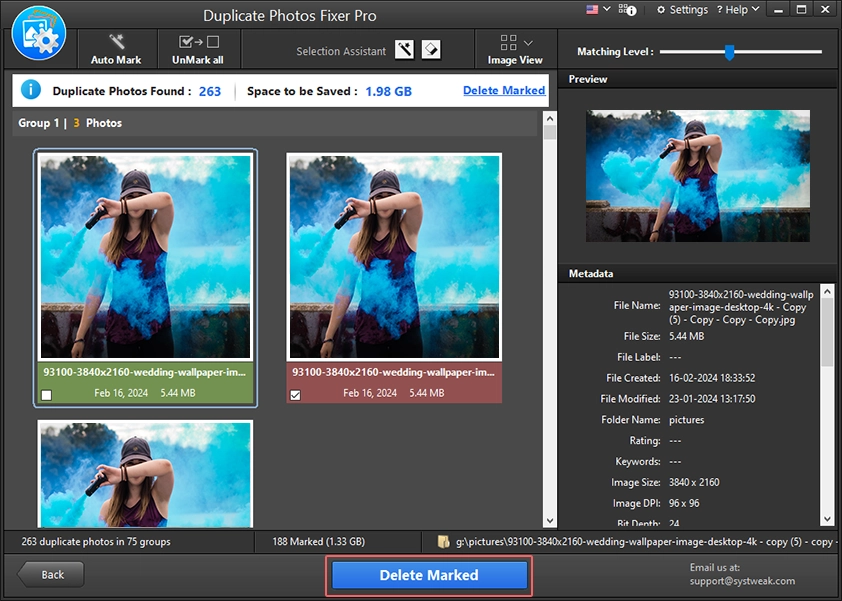
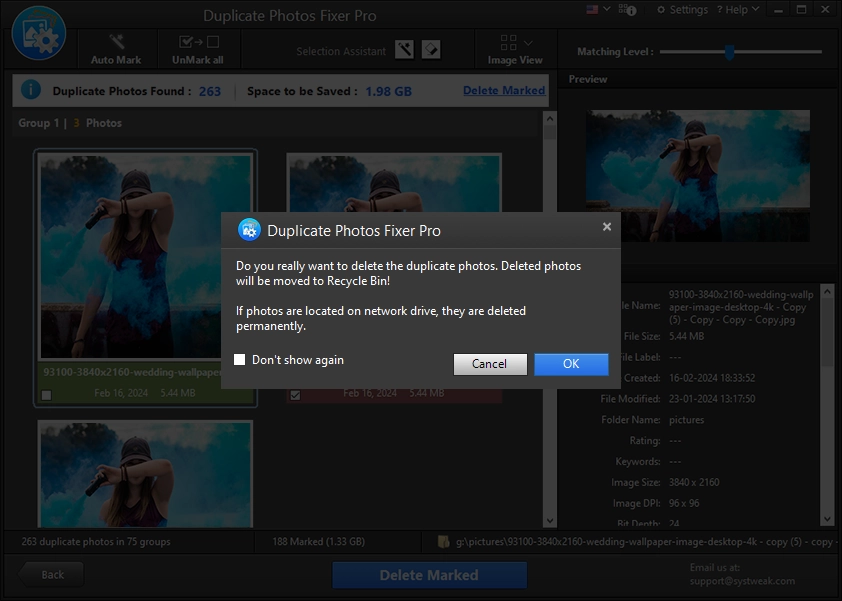
Step 11 - Confirm the action by clicking OK. This will move deleted duplicates to the Recycle Bin. If you don’t want to receive the confirmation prompt each time you delete duplicates, check the box next to “Don’t show again.”
Step 12 - You will now get a window where you can see the number of photos marked for removal and deleted photos.

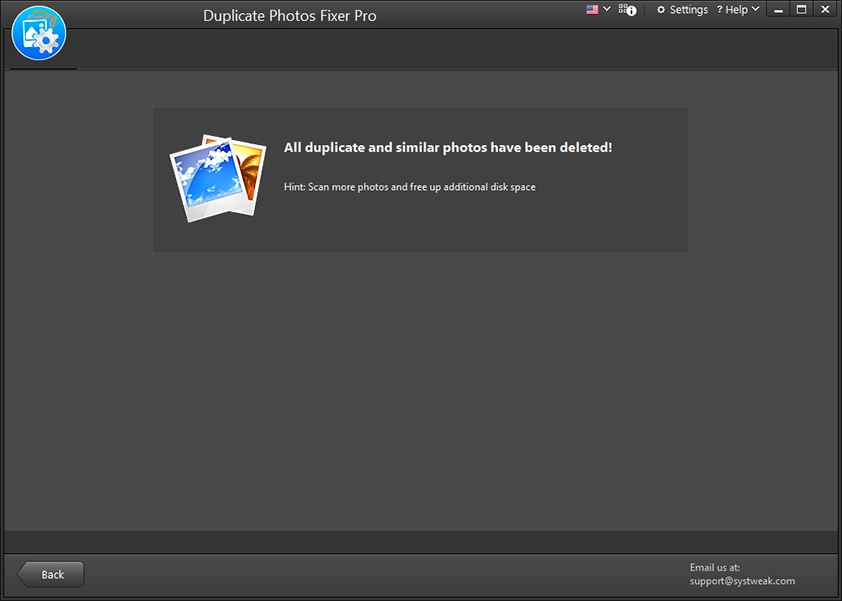
Duplicate Photos Fixer Pro will promptly eliminate the selected duplicate photos from your PC, reclaiming substantial storage space and optimizing your hard drive's performance.
Navigating through the software is a breeze, offering a user-friendly experience with added privacy assurance. The best part is that your data remains secure and offline throughout the process.
