How I Compare My Library Folder to Remove Duplicates On Windows 11/10
In this digital age, our photo collections serve as repositories of cherished memories. However, amidst the huge collection of digital images, one common problem that constantly appears is duplicate photos. These identical images not only clutter our library but also contribute to storage inefficiency. In this comprehensive guide, we’ll delve into the complexities of duplicate photos, exploring how they accumulated in the first place and the problems they pose. Additionally, we’ll outline the steps to effectively find every duplicate image to free up a significant amount of storage space.
How Duplicates of Specific Photos Are Created?
Well, the accumulation of duplicates and similar-looking photos is often a result of user actions or system processes. Here are some of the common factors:
- Users may unintentionally create copies of photos while organizing or transferring files.
- Backup software or syncing services may accidentally make extra copies of the same files.
- Software glitches or errors with the Operating System can lead to the creation of duplicates.
- If the same photo is imported multiple times from different devices, you may end up with tons of identical images in one place.
- When editing photos, users often create duplicate copies of the same image on purpose. However, if these edited files aren’t managed properly, it can add up to the pile of duplicates.
What Problems Arise Due to Duplicate Photos?
Now that you have understood the root causes of duplication, it is important to highlight the range of issues that impact the efficiency of users. Some of the major problems are listed below:
- Duplicate photos consume a significant amount of storage space on your device.
- It becomes challenging to maintain a well-organized photo library among all the duplicates.
- Having lots of duplicate images can slow down the photo processing, management & editing process.
- Multiple duplicates cause confusion while selecting the right version of a photo within a collection.
- Having multiple copies of the same photos may complicate the data recovery process. Users may struggle to find & restore specific images from the collection of duplicate photos.
If you're eager to de-duplicate and streamline your photo collection, we’ll tell you the most effective way to do so with the help of the right photo duplicate finder program – Duplicate Photos Fixer Pro.
How To Find Identical & Specific Similar Photos On Windows PC?
Eliminating duplicate images offers several benefits, including more room to store new photos, videos, and other files, less clutter, and a more organized and efficient library.
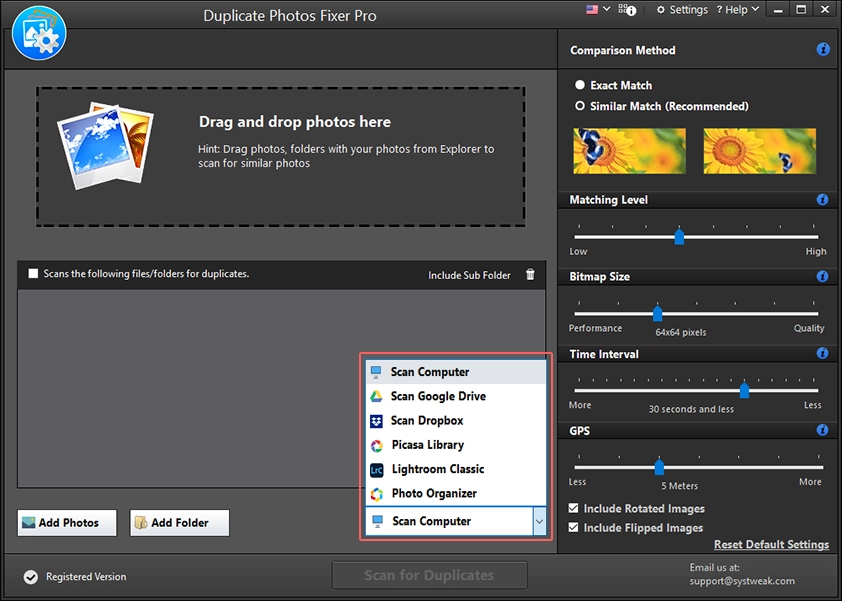
Introducing, Duplicate Photos Fixer Pro, one of the most reliable tools to find and erase exact and similar-looking images on your Windows PC. It is equipped with advanced algorithms that enable scanning the entire nook and cranny of the internal storage to detect clone images. Additionally, it supports scouring through removable devices such as SD Cards, USB Flash Drives, External Hard Drive, and even Cloud Storage Platforms like Dropbox as well. Users can even identify clone images from Picasa and Lightroom Classic too, making it an ultimate choice for both newbies and pro computer users. It supports more than 40+ popular image formats, including RAW images.
The best part is that users can adjust the comparison method and matching level to identify duplicates accurately. Follow the instructions stated below to learn how it works:
STEP 1 - Download, install, and launch the latest version of Duplicate Photo Fixer Pro on your PC.
STEP 2 - Add the folder or images you wish to scan. Alternatively, drag and drop images directly.
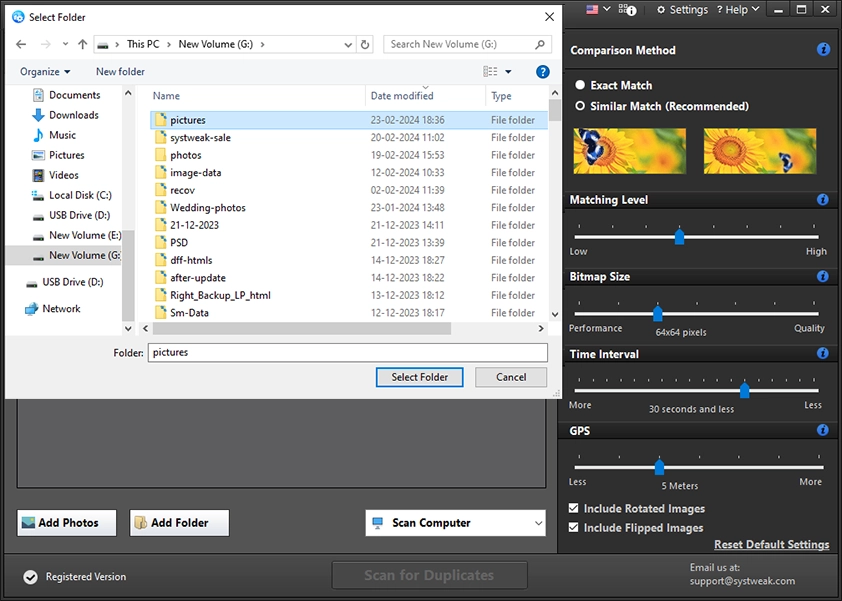
STEP 3 - Select the desired scanning mode for clearing duplicate and similar-looking photos.
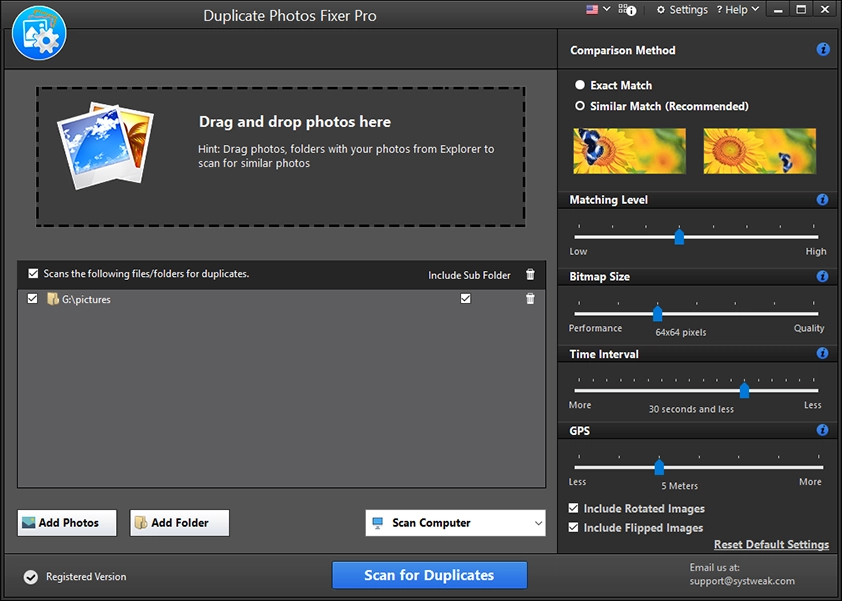
STEP 4 - To look for identical duplicates select Similar Match (Recommended). Use the slider to customize settings (if you want).
You can even select to include rotated or flipped images in the scan as well.
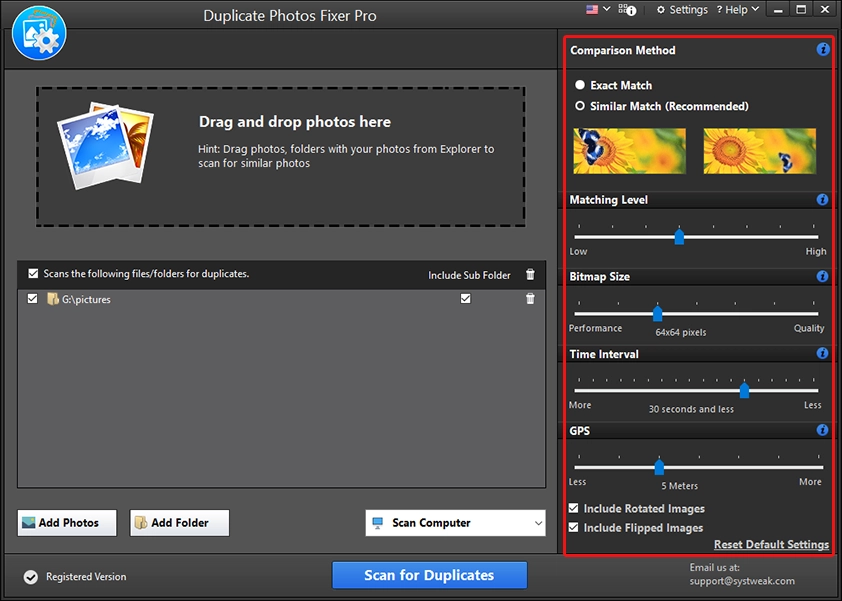
STEP 5 - Click on the Scan for Duplicates button to initiate the process.
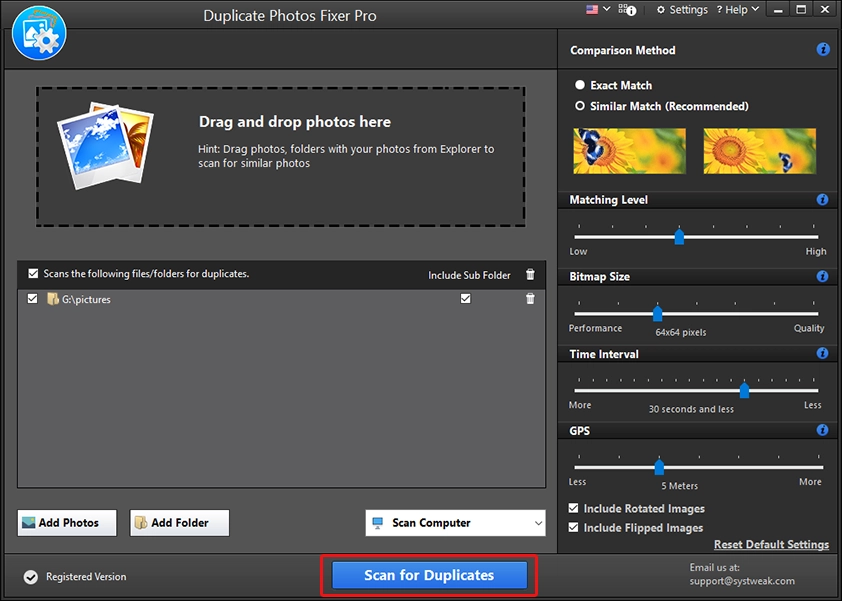

It would take a few seconds for the photo duplicate finder program to list out all the near-identical images.
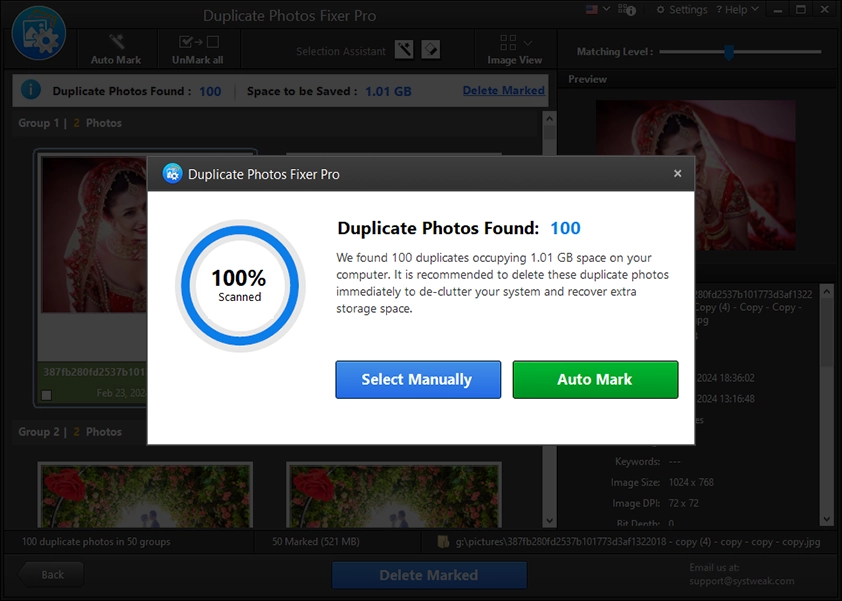
STEP 6 - You will now get two options - select duplicates manually or Auto Mark. To auto-select duplicate photos from each group, leaving one unmarked click Auto Mark.
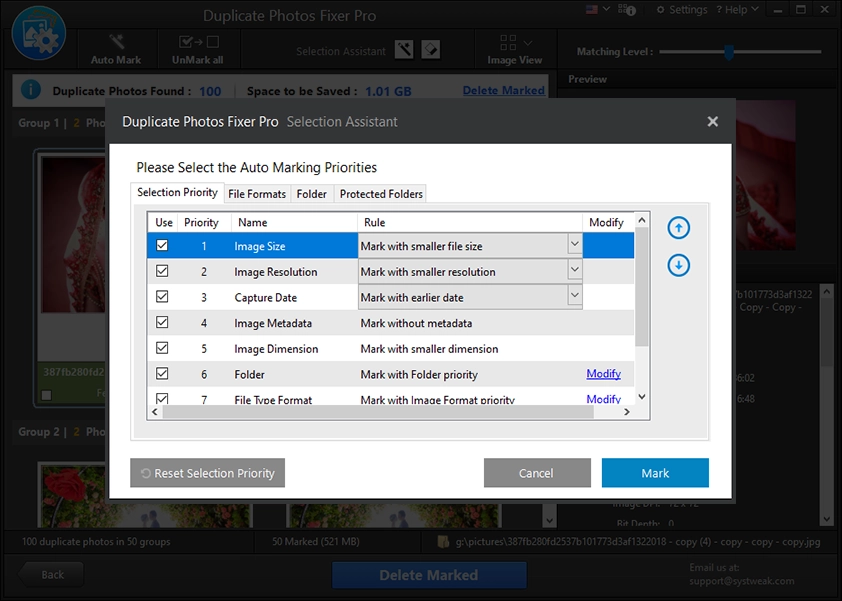
If you want you can customize auto-mark settings. To do so, click Open Selection Assistant and make the changes. However, if you want to use the default setting click the Continue button.
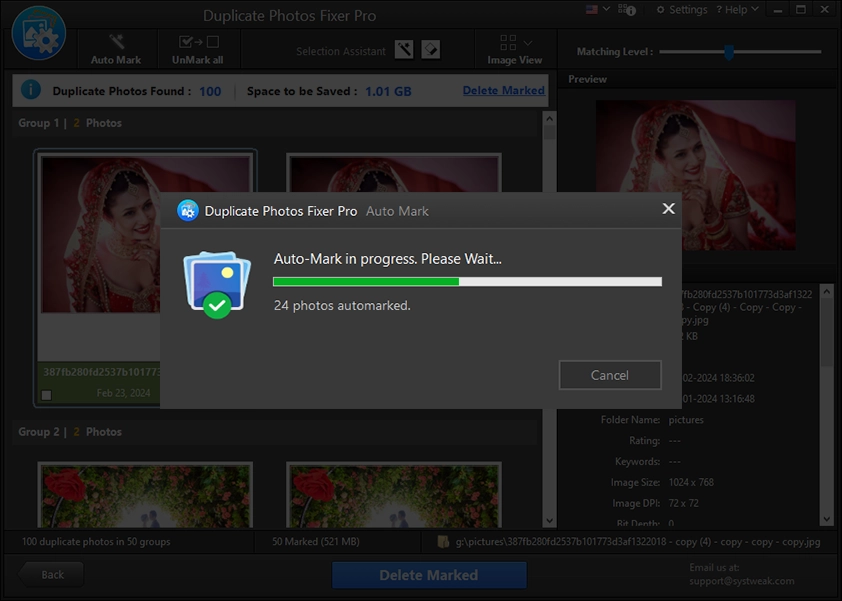
Duplicate photo finder in a few moments will auto mark duplicates automatically.
STEP 7 - Review the selection and click Delete Marked. Click the OK button to confirm your action!
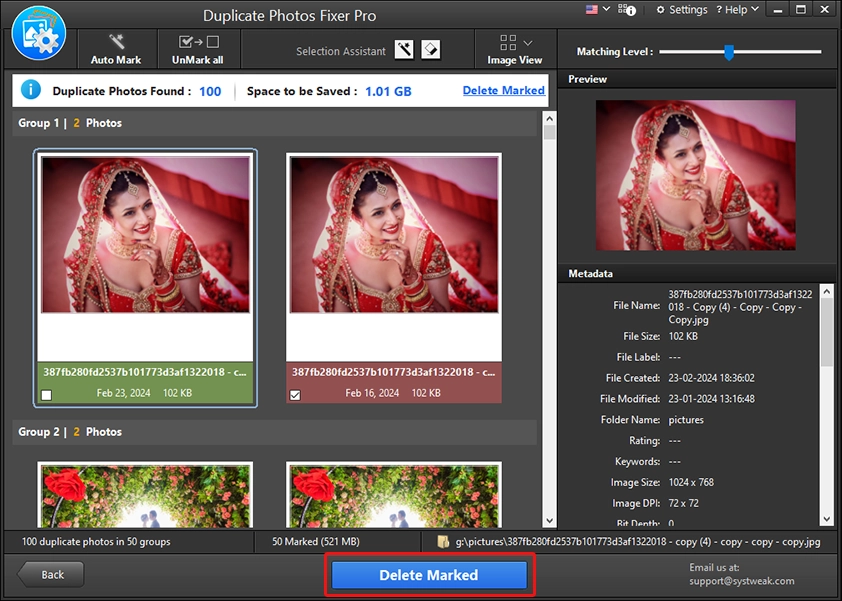
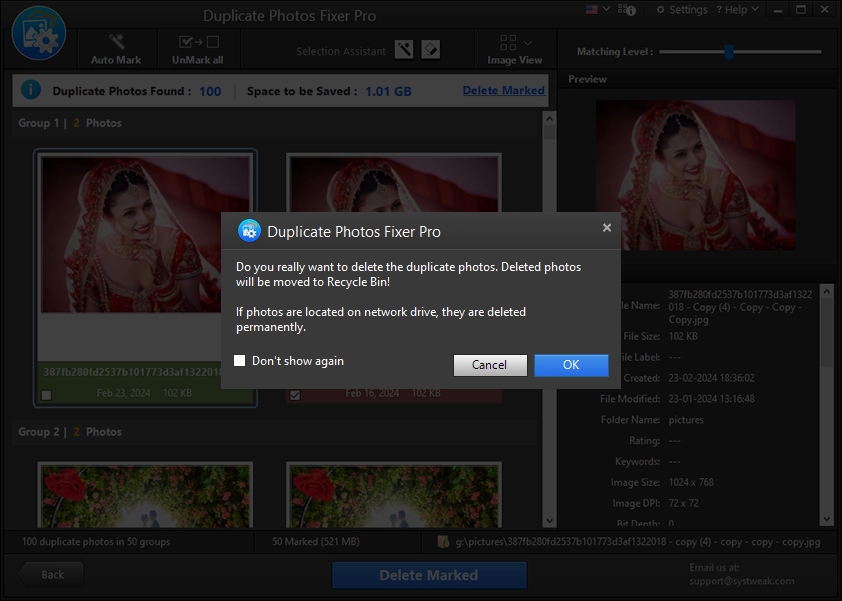
STEP 8 - Wait for the process to finish, when done, all the marked duplicates will be moved to the Recycle Bin.
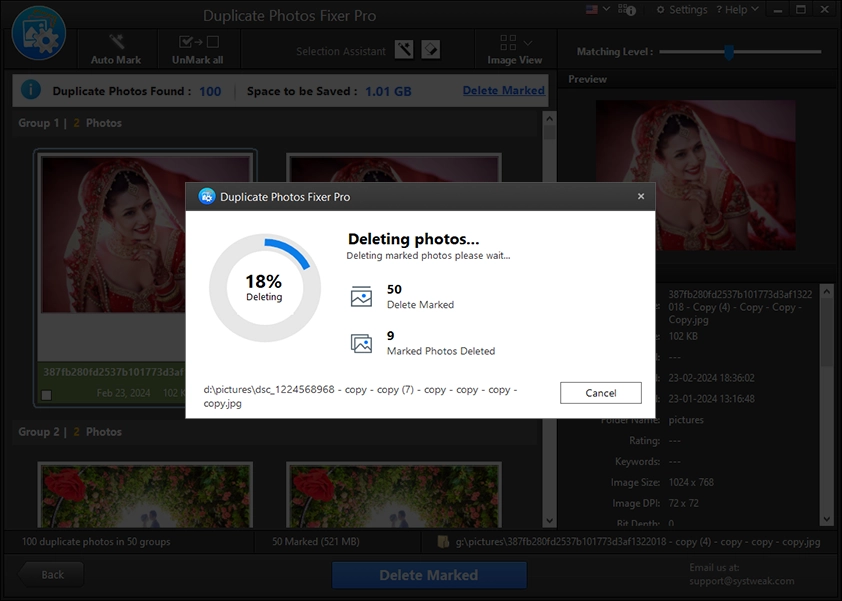
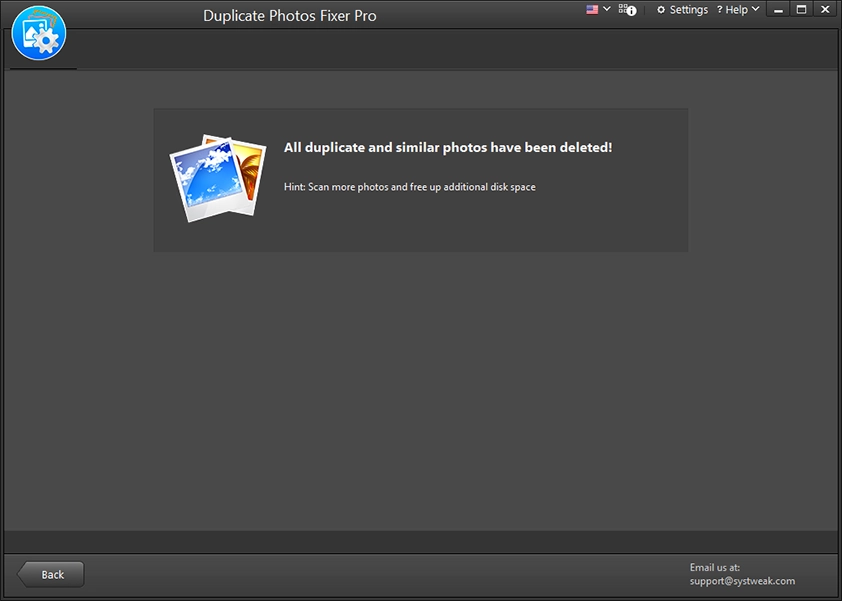
Hope you find this guide useful for eliminating duplicates and reclaiming valuable storage space on your PC.
