How to Manage Duplicate Photos Across Multiple Folders on a Mac?
While using a Mac, several users tend to get confused about where they have saved their images. Safari saves the files directly in the desired location, whereas if you use another browser like Chrome, it saves the files in the downloads folder. Sometimes, this confusion leads to the creation of duplicate images on your Mac.
You see, as a Mac user, you are already on thin ice when it comes to wasting storage space. In such a situation, if you have several duplicates, then things get tricky. Usually, when these files are in a single folder, they can be identified due to their saved file names. However, things get difficult when they are spread across multiple folders.
If you are wondering “How to manage duplicate files across multiple folders on a Mac?” then this is where your search ends! In this post, you will find the best way to manage duplicate photos on a Mac spread across multiple folders.
Why Is It Important to Remove Duplicates From Mac?
Like any other device, a Mac also requires proper free space to run smoothly. Since Mac does not allow you to extend the permanent storage and only has limited configurations you can opt for, wasting valuable space by keeping similar pictures can be a poor decision.
No matter how capable your macOS or the hardware is, if the storage is not up to the mark, it may show signs of degraded performance and affect your experience. To ensure you always have that last byte of usable space, you should keep the images and files optimized. This is why it is advised that you remove all duplicates, specifically images instantly from your Mac.
The Ultimate Way to Remove Duplicates Spread Across Folders in a Mac
Knowing the issue, you might have understood that the confusion caused due to images being duplicated and spread in multiple folders is extremely difficult to remove. You cannot just go to a folder and delete a file without ensuring an original file is securely saved in another folder.
So, the manual method is clearly out of the question. Now, out of the things that you can try, we recommend using the Duplicate Photos Fixer Pro for Mac.
The tool is one of the most powerful applications that you can use to find duplicate photos on your Mac. The best part is that the tool only requires a single scan, and it can find duplicate images from across the Mac, irrespective of the folder they reside in. The tool scans the added folders and images thoroughly.
Steps to find and remove duplicates saved on Mac
Step 1 - Download and install Duplicate Photos Fixer Pro on your Mac
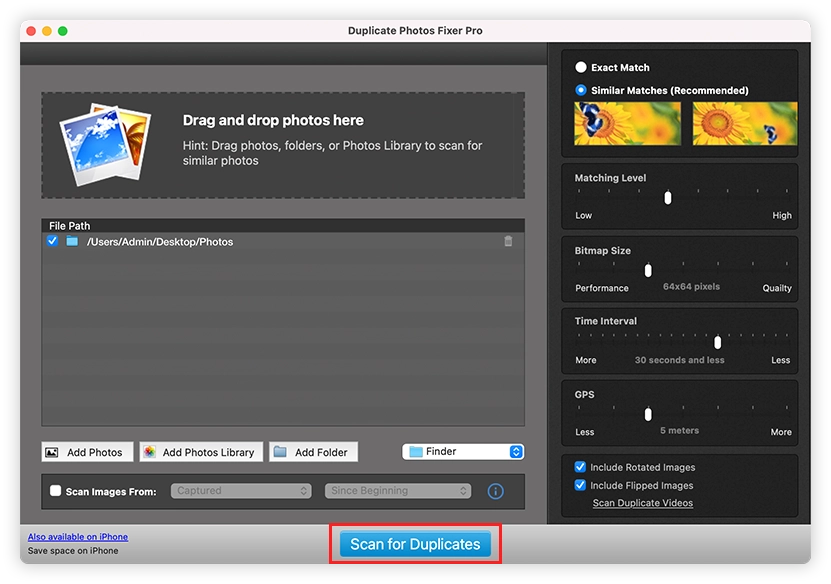
Step 2 - Launch the tool, keep the Source to Finder, and click on Add Folder or Add Photos to add images for scanning. After that click on Scan for Duplicates to proceed.
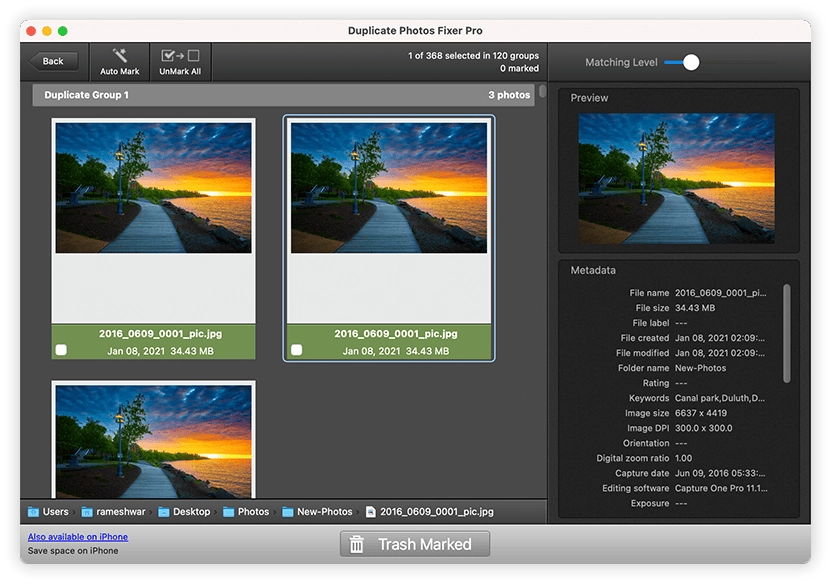
Step 3 - Wait for the scan to finish. You will now get grouped scan results. Review them and select the images you want to remove from your Mac.
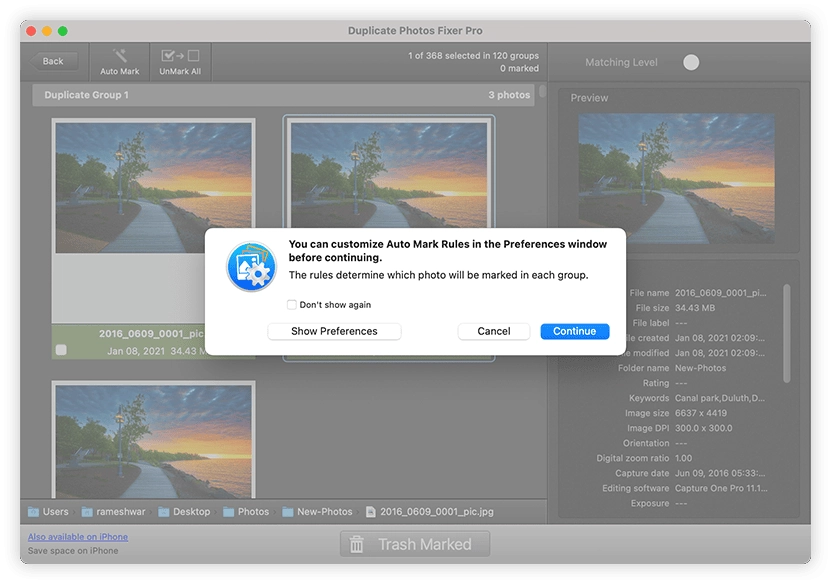
Step 4 - To avoid the hassle of manually selecting the files for removal at your end you can use the Auto mark feature. Click Auto Mark to instantly select the images leaving one in each group unmarked.
Note -When you click the Auto Mark option you will receive a pop-up window from where by clicking Show Preferences, you can customize Auto Mark settings. However, if you want to proceed with the default settings, click Continue.
Step 5 - Once you have reviewed the scan results and marked the duplicate images of cleanup click Trash Marked, and confirm the action to proceed.
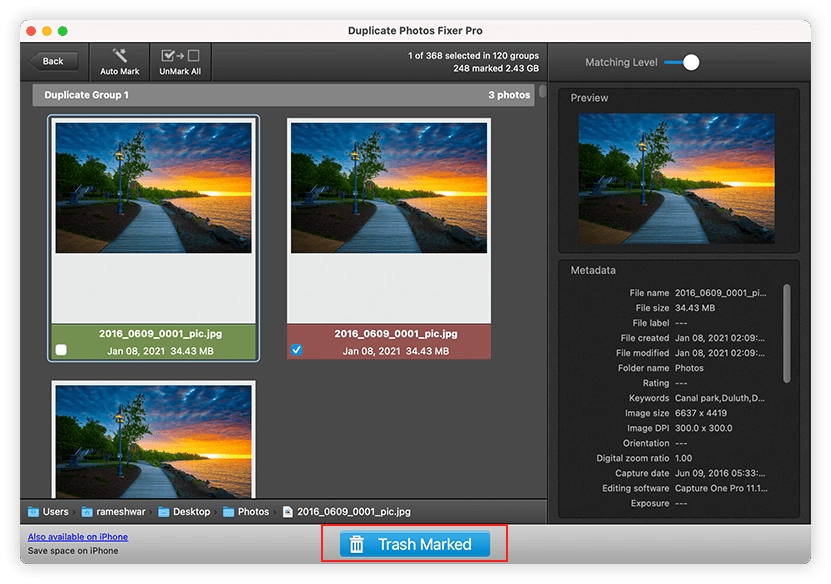
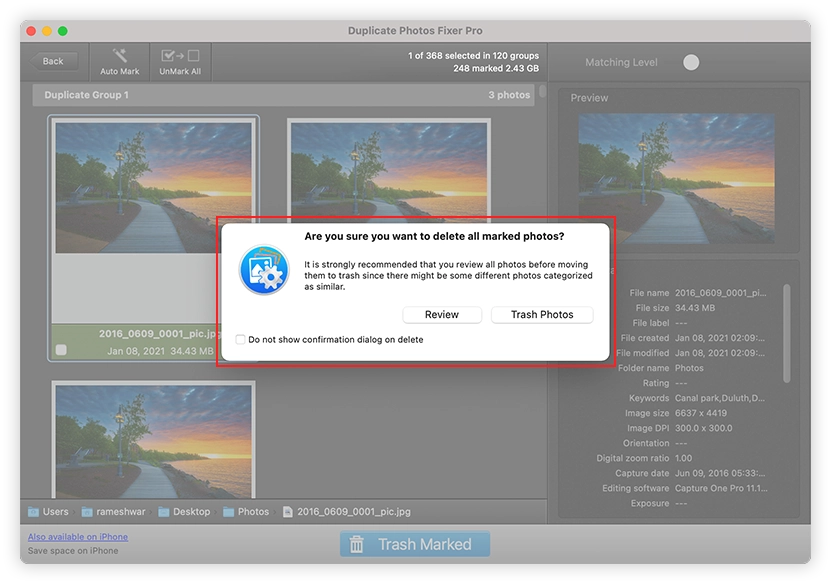
Step 6 - Wait for the files to be trashed and voila duplicates from the selected folder will be cleared.
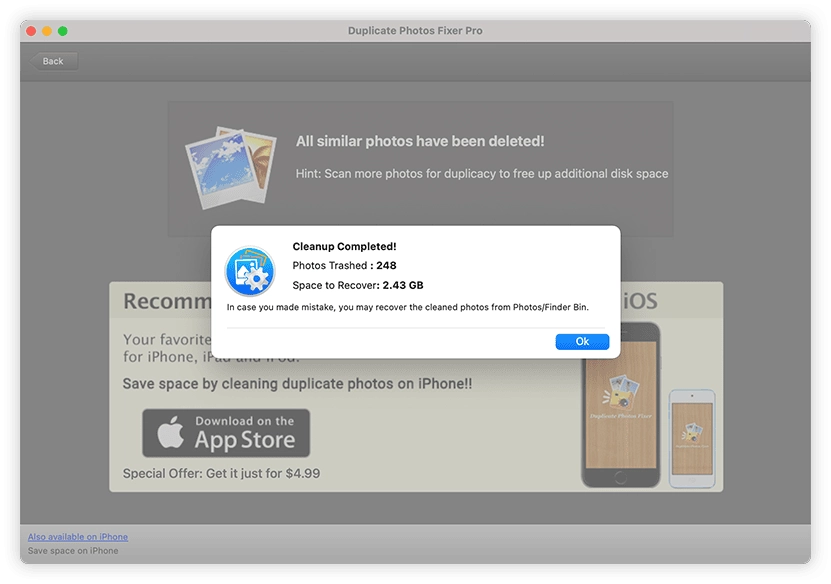
You will get a cleanup summary sharing information about the number of photos trashed and space recovered.
Removing duplicate files is a crucial task to finish if you want to keep your Mac optimized. Thanks to Duplicate Photos Fixer Pro, the error is easily resolved, and you do not have any hassle to go through.
