Easiest way to find and remove duplicate images on External drive
Free up space: Remove unnecessary duplicate photos!
Searching data on a drive filled with duplicates can be time-consuming. By eliminating duplicates, using Duplicate Photos Fixer Pro, you can easily streamline data, save time, and improve backup and file transfer times.

For Windows 11/10/8.1/8/7 (Both 32 & 64 Bit)
How to Delete Duplicate Images on External Hard Drive: PC
While transferring images from one device to another, often a large number of duplicates are formed. You don’t pay attention to it until one day you are out of storage space. This is one of the issues with the internal drives as well as external storage drives such as USB flash drives, memory cards and hard disk drives.
You must have tried to delete the large amount of duplicate photos manually, but it is a tedious task. The copies of images which are saved with different file names, edited versions often are overlooked. Therefore, to remove similar images and the exact duplicates present on the disk, one must take help from a duplicate photo finder tool.
Duplicate Photos Fixer Pro can delete duplicate photos on external hard drives effortlessly. It is important to know that the duplicate images finder tool supports all types of external drives when connected to a computer. Its robust scanning algorithm makes sure to run a deep search for duplicate images based on file content.
Duplicate Photos Fixer Pro - The Easiest Way to Find & Delete Duplicate Photos on External Drive
Duplicate Photos Fixer Pro is an app that deletes duplicate photos from your external drive connected to Windows. You can also use this tool to delete duplicate photos which are saved with different names. It quickly scans the external drive for all the copies of images and presents them to you in grouped results. This makes it easier for you to check the images and get their details in the preview.
The Auto-mark feature allows you to mark all copies and keep one image in each one of the grouped results. It makes the cumbersome process of manually selecting the duplicate images easier.
Notable features of Duplicate Photos Fixer Pro -
- Detects flipped and rotated images.
- Matching levels, Bitmap size, Time interval and GPS.
- Choose to find exact duplicates or similar images.
- Scan supported for internal and external drives.
- Supports scanning cloud storage - Google Drive & Dropbox.
- Detects duplicates from Lightroom Classic, Picasa.
- Drag & Drop photos or folders.
- Ability to scan RAW images.
- Selection assistant for automatic selection in scanned results.
Let us guide you through the steps necessary to find and delete duplicate photos from external drives.
Before you proceed, make sure you have connected the external drive to your computer.
Step 1 : Download Duplicate Photos Fixer Pro from the download button given below.
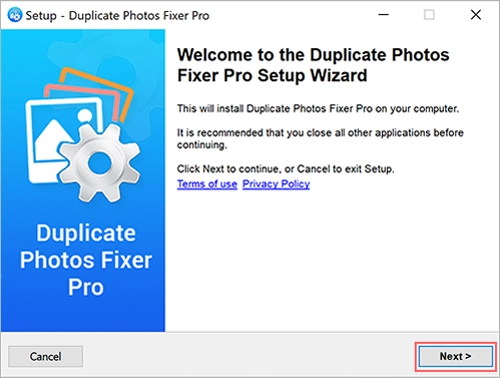
Step 2 : Once the setup file is downloaded, double click on it to run the installation. Follow the on-screen instructions to install the app on your computer
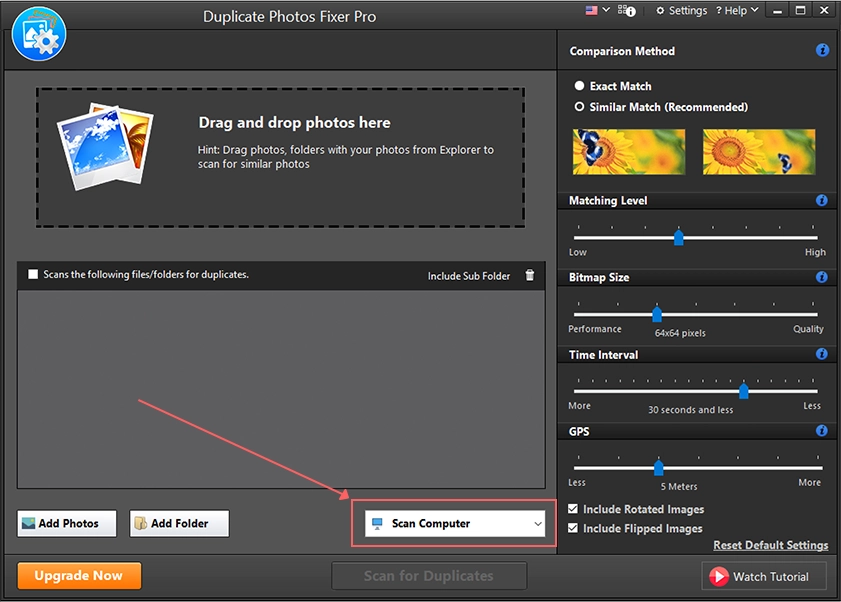
Step 3 : Launch Duplicate Photos Fixer Pro and select Scan Computer option.
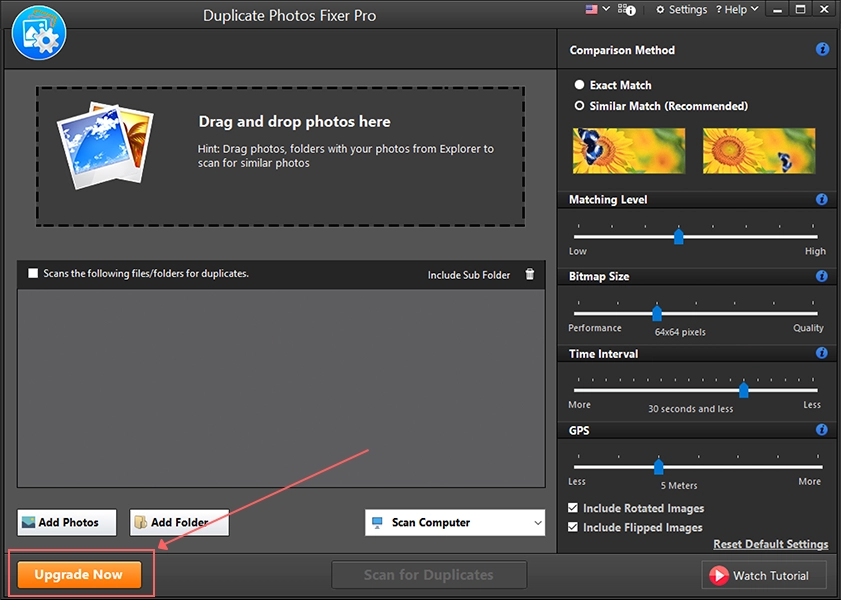
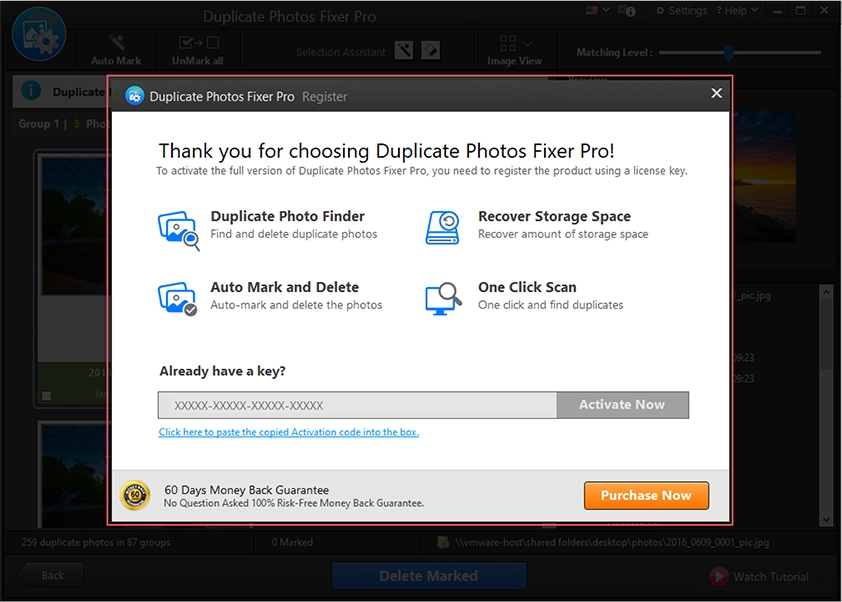
Make sure you upgrade to the Pro version as it will help you remove all duplicate images at once. To do so, click on the Upgrade Now button placed at the button-left and follow the on-screen instructions.
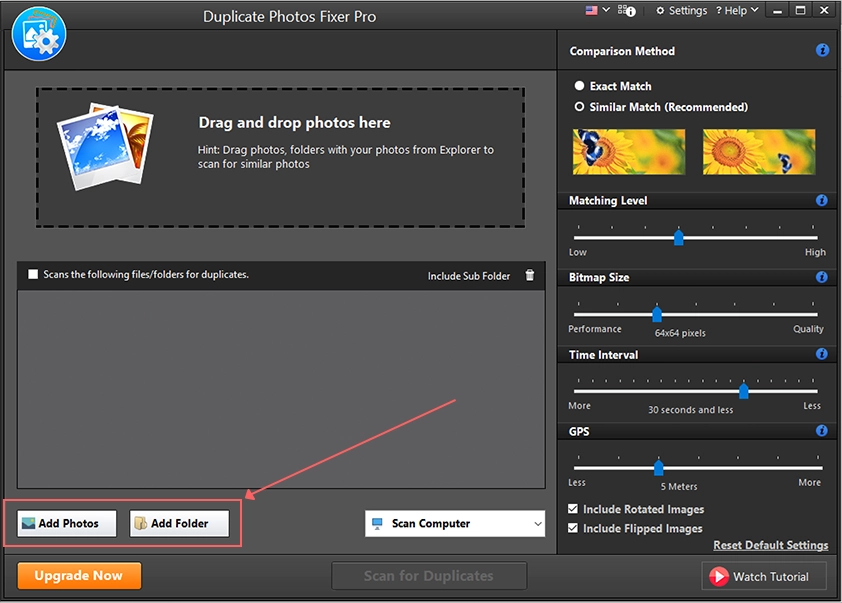
Step 4 : Use Add Photos and Add Folder button or drag & drop images from external hard drive to add images to Duplicate Photos Fixer Pro.
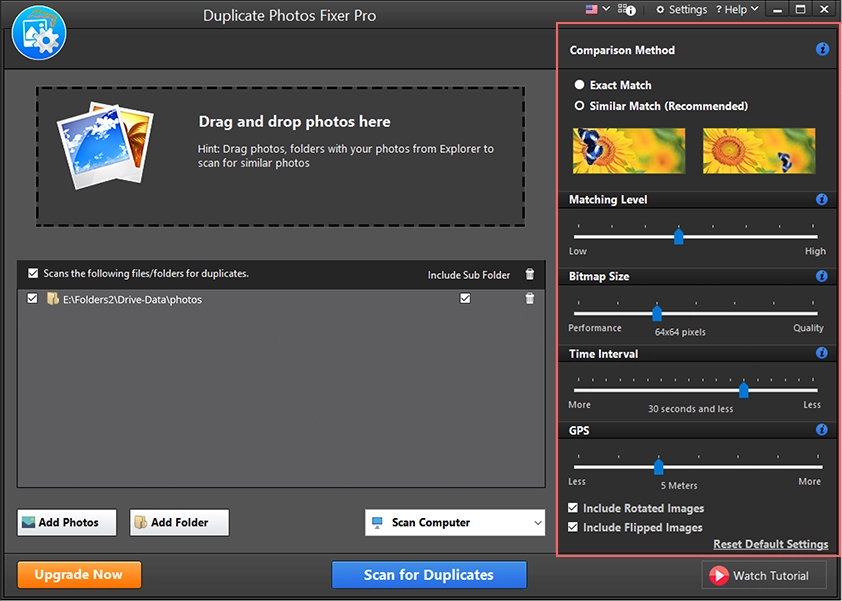
Step 5 : Now, move to the right panel of the software to make your selection for comparison methods etc.
Exact Match: It will search for only exact copies of the photos.
Similar Match(Recommended):It will search for similar images.
Next, set the bar for the Matching levels, Bitmap size, Time Interval and GPS. Check the Include rotated images & Include flipped images to enable the app to find duplicate images whose orientation is changed.
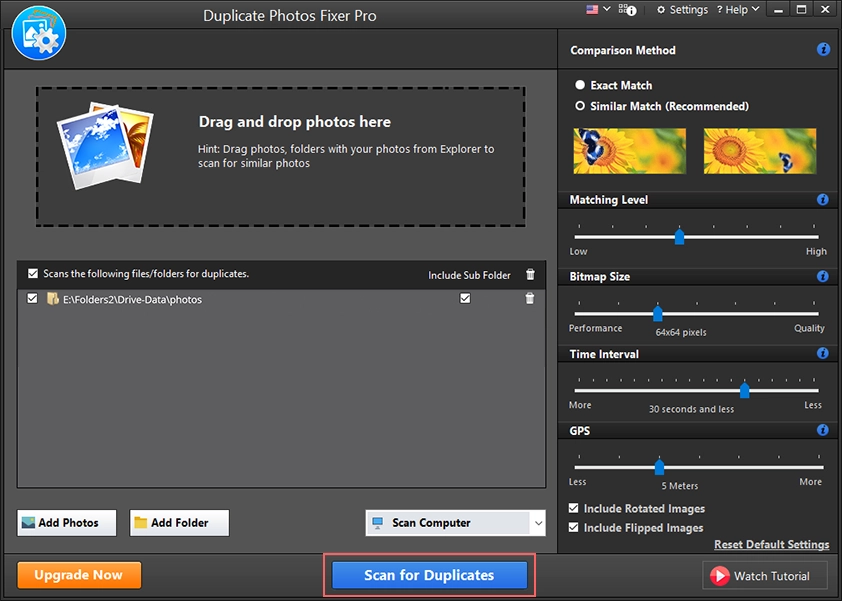
Step 6 : Click on Scan for Duplicates. This will initialize the scan where the app will search for duplicates images among the selected images and folders.
Note - If you want to search for RAW images, when a pop-up appears, follow the on-screen instructions for downloading additional packages on your computer.
Step 7 : Once the scan results appear, several groups will appear. Here you can click on an image to get a preview and details on the image.
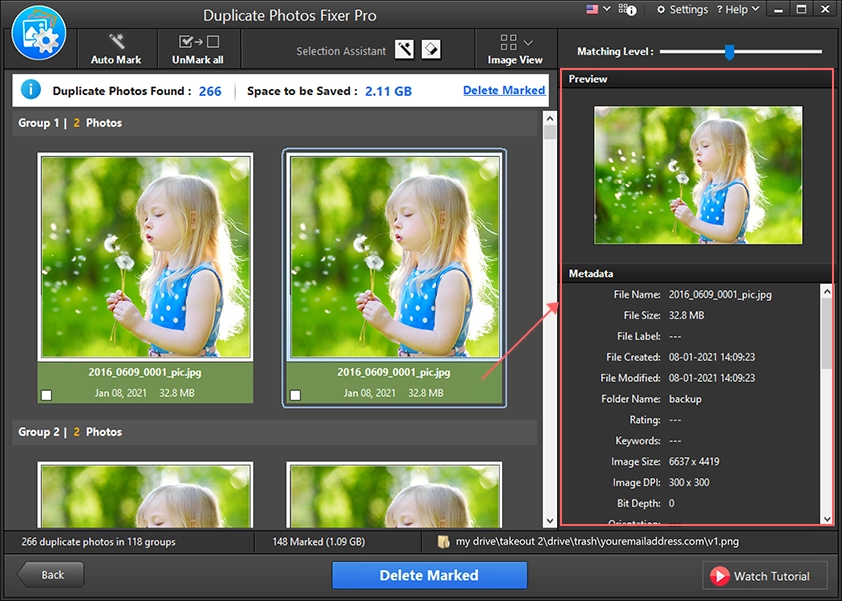
You can use Selection Assistant from the top-bar to make changes to the automatic selection of images. It helps app to clear duplicate photos from the selected parameters such as image metadata, image resolution, size, dimension, folder, capture date and file format.
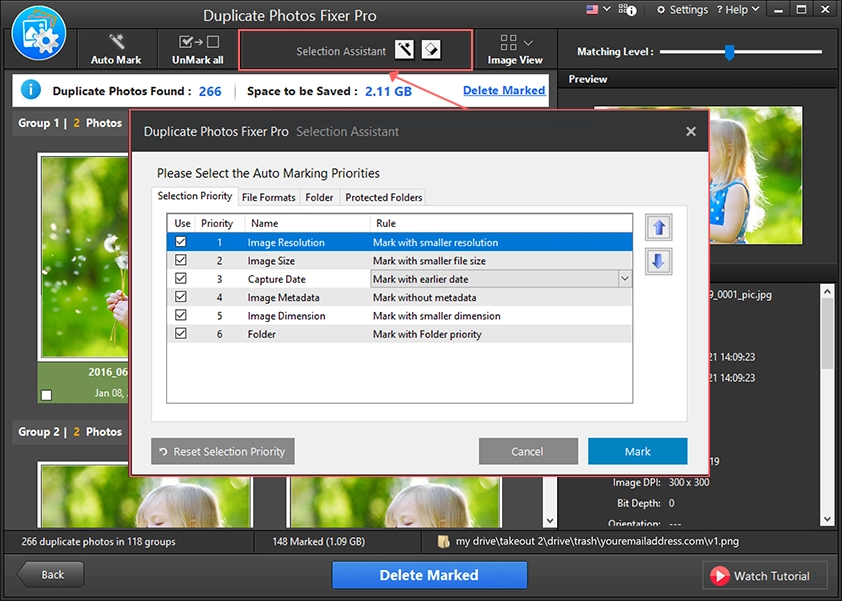
Step 8 : Click on the Auto Mark button and you will notice all the copies in each group leaving one image are selected automatically. This makes the tedious job of selecting images manually much easier.
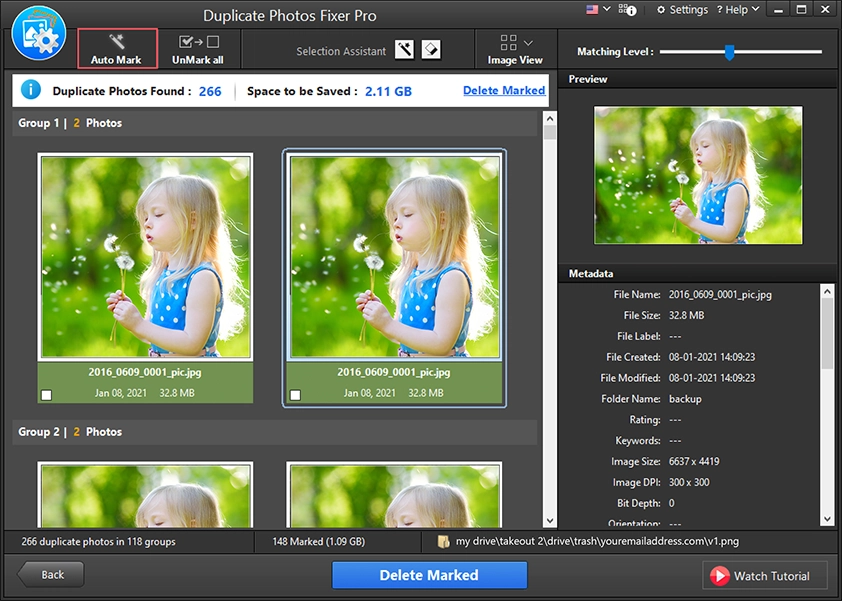
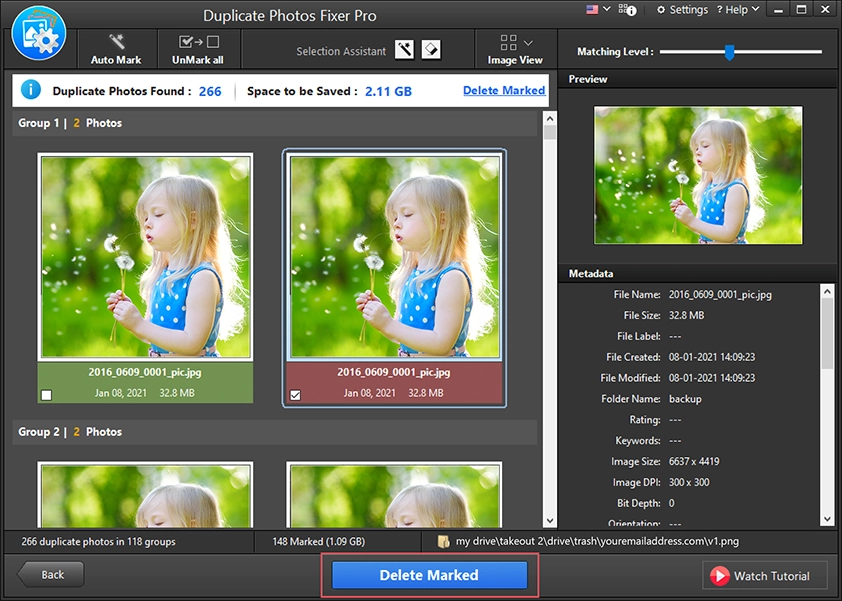
Now, simply click on the Delete Marked button to erase large duplicate photos from the external drive.
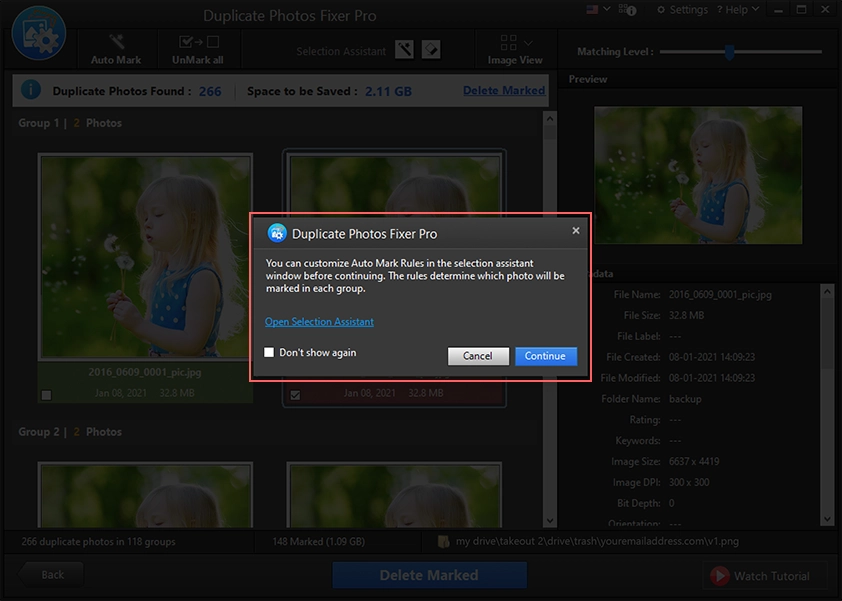
A pop-up message will appear to notify you that the images once deleted cannot be retrieved. Click on Continue to move forward.
Duplicate Photos Fixer Pro will immediately remove all the selected duplicate photos from your external hard drive. This will recover a ton of storage space on your hard drive.
Frequently Asked Questions:
Q1. How can I find duplicate photos in a very large pool of data (tens to hundreds of gigs)?
Duplicate Photos Fixer Pro is an efficient tool for Windows. An app to remove duplicate photos from a large pool of photos using the robust scanning and auto mark features.
Q2. Photos messed up after copying from a USB drive [duplicate]?
If you are suffering from an unorganized photo collection on your external storage device, we have a quick solution. Use Duplicate Photos Fixer Pro to scan and detect all the duplicate images. Then use the Automark feature to automatically select hundreds of copies and free up storage space.