Home / User Guide / Scanning for Duplicate Images
Scanning for Duplicate Images
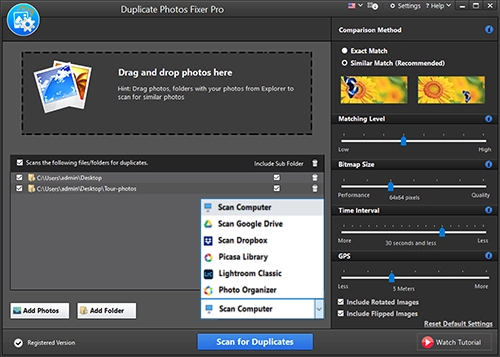
First, select the area you want to scan by clicking the down arrow to start the scanning process. Duplicate Photos Fixer Pro allows scanning
- PC
- Google Drive
- Dropbox
- Picasa Library
- Lightroom Classic
- Photo Organizer
If you are scanning cloud storage, you must grant access permission.
Next, add folders or photos to scan. You can even drag and drop images. After that, select the Comparison Method. If scanning for similar images, adjust similarity scan settings by adjusting the slider on the home screen.

Now, click on Scan for Duplicates to start the process. The scanning time will vary depending on the number of images, scan mode, and the settings. The more the number of images, the longer the scan will take.
When the scan is complete, you will get a scan summary that will tell the number of duplicate photos found and the space you can save after deleting them. In addition, you can even change viewing mode, see Metadata, change the matching level, see a preview of images detected, Auto Mark, unmark duplicates, use Selection Assistant, and clear scan results.
Select the images you want to remove and use the Delete Marked button.