Home / User Guide / User Interface
User Interface

The welcome window of Duplicate Photos Fixer Pro is divided into sections and subsections. From here, you can easily -
- Drag and drop photos
- Add Photos/ Add Folder
- Scan mode
- Comparison method
- Scan settings
- Include or exclude rotated or flipped images from scanning
- Settings
- Scan for Duplicates
Drag and drop photos: Without navigating to the folder or photo location, simply drag and drop the pictures and folder you wish to scan for duplicate images.
Add Photos: Navigate through the File Explorer and select images for scanning.

Add Folder: Allows adding an entire folder with the pictures to scan for duplicates.

Scan Mode:Duplicate Photos Fixer Pro allows scanned PC, Google Drive, Dropbox, Picasa Library, Lightroom Classic, and Photo Organizer.
You just need to click the down arrow, select from the list of options, and follow the on-screen instructions to scan the selected area for duplicate images.

Comparison Method:
Duplicate Photos Fixer Pro offers two comparison methods - Exact Match and Similar Match. You can use either as required and perform the scan.

Exact Match- Helps detect and remove duplicate copies of images.
Note:Since this method focuses on detecting images that are 100% alike or are an exact copy, the scan results will vary when performing a scan using Similar Match.
Similar Match- Scans and identifies images with similarities based on geographical location, time interval, etc.
Note:The scanning criteria can be customized using the slider given under each sub-section.

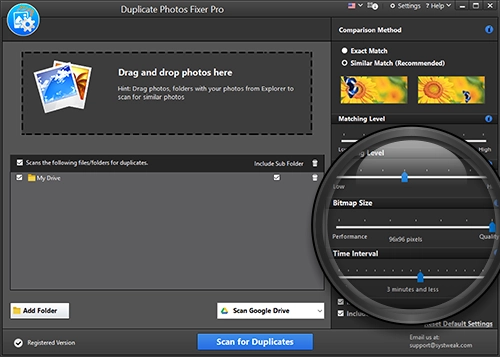
Matching Level
The first setting you see is the Matching Level. This option helps determine the degree of similarity between two images. The slider allows adjusting the matching level.
-
Low Matching Level: Moving the slider towards the left will show images with noticeable differences. This means both images will have similar objects, but their placement might differ.
-

-
Middle Matching Level:This is the default setting, and the results you get when you use this setting will be near-identical images.
-

-
High Matching Level:When the Slider is moved to the extreme right, the degree of similarity reduces, the search result is narrowed, and you get almost identical images.
-

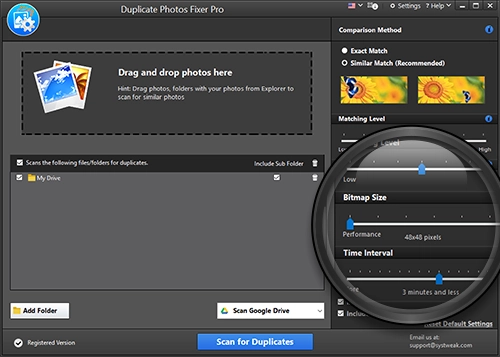
Bitmap Size
The second setting is the Bitmap Size, which helps manage the accuracy of search results. You can adjust the slider between performance and quality.
As you move the slider to the left, the results you get will be based on performance, while toward the right, it will be based on quality. The default setting of the Bitmap size is 64 pixels.

Tip: For quick and near-accurate results, move the slider towards the extreme left, while for accurate results, move the slider to the right.


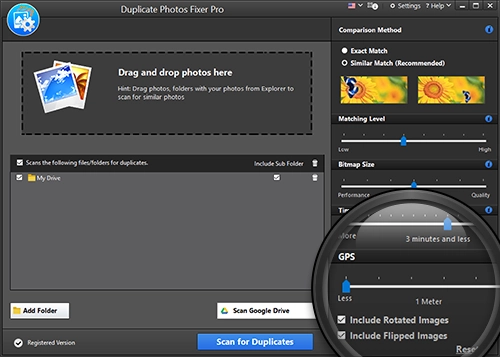
Time Interval
The third setting is Time Interval. It helps perform a scan for duplicate images based on the time interval between the two photos. The default setting is 30 seconds, and the maximum time difference between clicking the two images can go up to 24 hours.

As you move the slider towards the left, similar images that have been clicked in burst mode or with less time difference will be detected.

The minimum time difference considered between two images is 1 sec. This setting is useful when the user has taken pictures in quick succession.

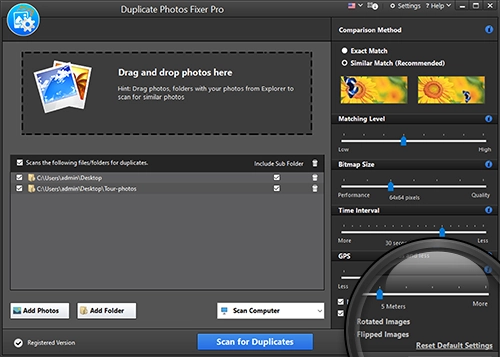
GPS
The final setting is GPS. It checks the embedded coordinates in the photos, and the default setting is set at five meters.

The minimum setting is one meter.
When the slider is moved toward the left, two images with one meter of distance are detected.

The maximum setting is 100 meters, which you can select by moving the slider towards the extreme right.

Include or exclude rotated or flipped images from scanning

This setting comes in handy when you have images that are either flipped or rotated. You can identify duplicate images using these options even when rotated or flipped.
Settings:
The setting option is provided at the top right corner of the screen. It is further divided into five subsections -
- General
- File Formats
- Scan mode
- Excluded Folders
- Scan Criteria
- Move Duplicates
Clicking on each gives various options, allowing you to choose the ones you want to enable.
You can choose whether or not to see a confirmation box, Auto Mark dialog, notification when going back to the Home screen, launch the product at startup, see product messages, get other product recommendations, and update messages.

File Formats:
This option allows you to exclude or include file extensions from being scanned.

Excluded Folders:
Using this option, you can add folders you wish to skip from scanning.
Click the Add button > browse the location and add the folder to exclude.

Scan Criteria:
This option allows customizing scan options like time intervals, GPS, etc.

Move Duplicates

From this window, you can decide what to do with duplicates once you delete them - Move them to the Recycle Bin or a selected location.
Reset Settings:
This button at the bottom left corner restores settings to their default state.

Scan For Duplicates:

Once all the settings are applied and photos are added to initiate the scan, you use the Scan for Duplicates button on the home screen.
Other Settings -
Language:
Duplicate Photos Fixer Pro is a multi-lingual tool that allows you to choose from 14 languages - English, Danish, Dutch, French, German, Italian, Norwegian, Portuguese, Spanish, Swedish, Finnish, Russian, Japanese, and Chinese.

Help Options:
The help option gives various options for user assistance:
-
Help - redirects to the Duplicate Photos Fixer Pro support page that contains FAQs and software-related queries.
-

-
Contact Us - redirects to the page to submit a query.
-

-
Clear Cache - This option helps clear scan results and refreshes the application.
-

-
Enter Registration Key- Click here to enter the registration key and activate the product.
-

-
Check for Updates - Download the latest software update. To download updates, you must have an active internet connection.
-

-
About - Get information about the developer, privacy policy & uninstalling the product.
-
